
WordPress plugins are the set of code that helps you to add / modify the contents of your site without removing your code. Creating a WordPress plugin becomes a more important part in WordPress development. It’s always better to create a plugin instead of writing your code into theme. Want to add extra feature into your site, the first thing you would like to do is to search various free WordPress Plugin repositories and sources to see if any WordPress Plugin development company has already created a WordPress Plugin that suits your business needs. If not, here is an easy guide on how to create a WordPress plugin from scratch.
Getting started with WordPress plugin development
Step 1: Creating new plugin files
First thing you need to look into is the directory structure of the plugin which it will be following and create the starting point file which handles the entire plugin and its resources.
a. Create a new directory for example: mypluginin/wp-content/plugins/ directory of your wordpress setup. So your plugin path will be like: /wp-content/plugins/myplugin/
b. Go to that myplugin directory and now create new PHP file: myplugin.php
Step 2: Create header comment of plugin file
Next step is to define the plugin which you are developing. WordPress requires all the plugins to follow its standards and provide plugin information and definitions accordingly. Plugin file must contain some basic meta information which provides WordPress and users, the basic knowledge about the plugin and its development.
These details are to be filled out in the plugins main file:
a. Open myplugin.php file and start editing with below code
Plugin Name: (required) The name of your plugin
Plugin URI: The home page of the plugin website
Description: A short description of the plugin which is displayed in wordpress backend
Version: The current version number of the plugin like 1.0
Author: The name of the plugin’s developer
Author URI: The author’s website or profile URL
License: Short name (slug) of the plugin’s license
License URI: Link of license URL
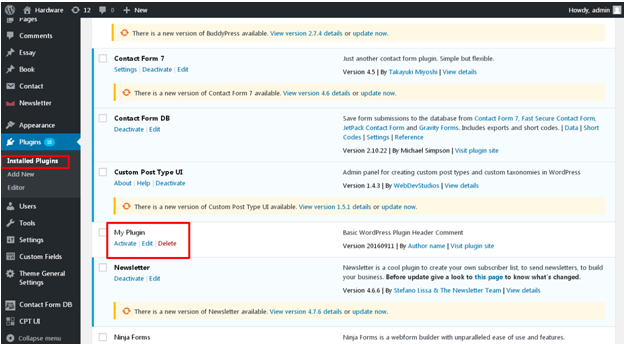
b. After saving the file you can see that your plugin is now listed in plugins list in WordPress backend as shown below.
Step 3: Create custom code of plugin file
After we are done with basic plugin setup, we can move on to the next step which will be the plugin’s functionality and how it should work .For that we have to understand how we can use different types of hooks and how to override default WordPress or create new functionality. There are two types of hooks:
- Actions Hooks – Actions hooks can be used for adding new or override core functionality of WordPress
- Filters Hooks – Filters hooks are used for altering the WordPress content
Let’s check some real time example
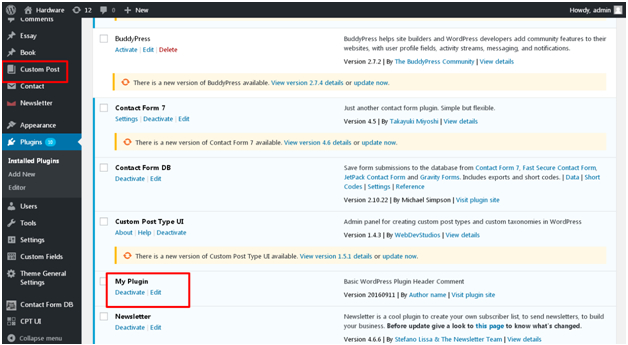
We will create new post type with help of plugin. By this we can create a new section in admin which can provide us an additional functionality like Posts and Pages.
This will register new post type custompost on plugin activation. And you can see a new menu Custom Post in WordPress Admin in the left side panel.
Add a new custom post by clicking on Add New in the Custom Post menu.
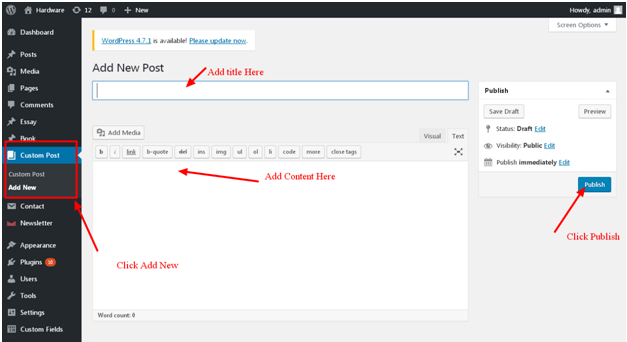
Here you can fill out all the info for this new post type and after filling out the details click on Publish to save details.
Step 4: Create shortcode to load the custom posts
Now next step is to load all the custom posts which are added on front page from admin. For that we have to create functionality for shortcode so that it can load that custom post from plugin.We will use the same file to add the shortcode functionality and the complete file myplugin.php will look like as below
The code after “add_shortcode” function is to show the list of the custom posts on any page in WordPress.
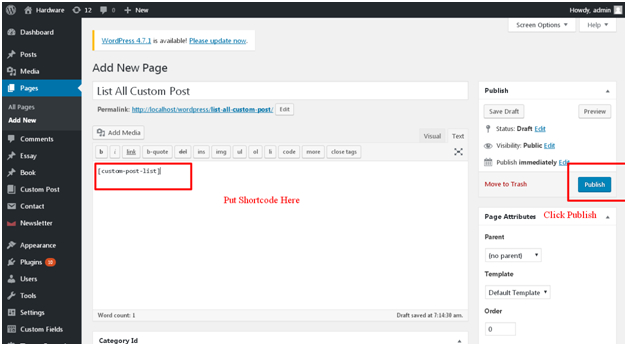
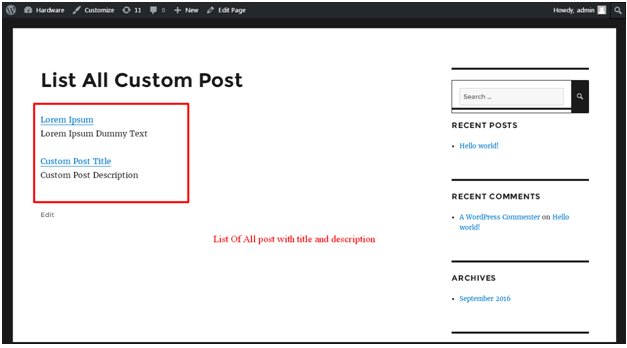
Step 5: Use short code to load the custom posts
Now the only thing left is to use the short code in WordPress to get the list of custom posts and show on front side pages. To achieve that go to WordPress Admin and create a new page. Provide the title of page and just use the code below in description and Publish the page to save it.
Now if you go to this new page on the browser then you can see the post list which is added in admin inside the new created custom posts.
By following the same process you can add any images or any other resource for your plugin to meet your requirements.


No comments:
Post a Comment