
In this post we will look how to install the WordPress on your system. First we need to download the WordPress. Just follow the steps shown below
Downloading WordPress
When
you open the link https://wordpress.org/download/, you will get to see a screen
as shown in the following snapshot −

Requirements for Running WordPress on your system
- Database required : MySQL 5.0 +
- Web Server: WAMP(Windows), LAMP (Linux), XAMP (Multi-platform), MAMP (Macintosh)
- Operating System − Cross-platform
- Browser Support − Firefox, Google chrome, Safari, Opera, etc.
- PHP Compatibility – At least PHP 5
WordPress Installation Procedure:
WordPress needs a MySQL database. So we need to create a new empty database with user/password (for example, user as "root" and password as "root" or else you can set as per your convenience). and then continue with the procedures
Following steps describe how to set up WordPress locally on your system.
Step 1: Extract the downloaded WordPress folder and upload it into your web server or localhost Open your browser and navigate to your WordPress file path, then you will get the first screen of the WordPress installer as shown in the following screen. In our case, the path is localhost/< Your_wordpress_folder >.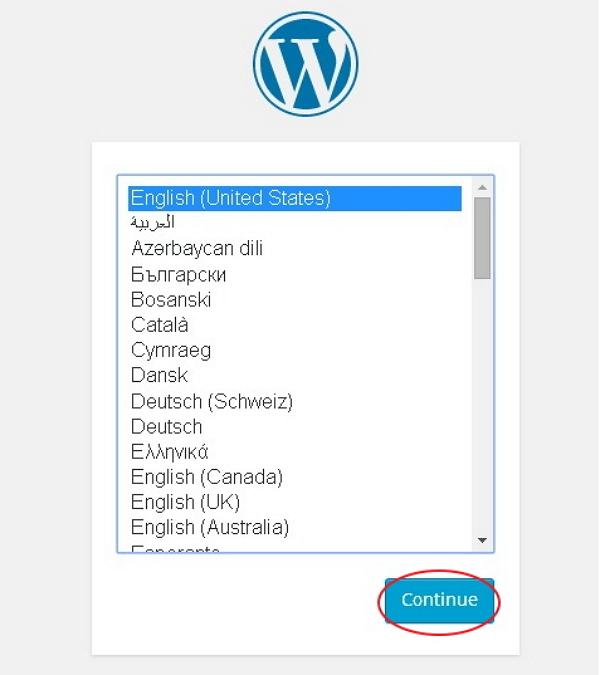

Select your language for the WordPress and click on Continue WordPress installation.
Step2: In this you can see the information needed for the database before proceeding with WordPress installation.

Step3: Here, you have to enter the information about the MySQL database as described in the following screen.

Database Name − Enter the same database name which you have created in MySQL database for WordPress.
Username − Enter the user name of your MySQL database.
Password − Enter the password which you had set for MySQL database.
Database Host − Write the host name, by default it will be localhost.
Table Prefix − It is used to add prefix in the database tables which helps to run multiple sites on the same database. It takes the default value.
After filling all information, click on Submit button.
Step4: WordPress checks the database setting and gives you the confirmation screen as shown in the following snapshot.

Click on Run the install
Step5: Enter administrative information.

It consists of the following fields −
Site Title − Enter the name of the site which you are going to create in WordPress.
Username − Enter the username as per your choice while logging in the WordPress.
Password twice − Enter password two times to protect your site.
Your E-mail − Enter your e-mail address which helps to recover the password or any update.
Privacy − It allows the search engine to index this site after checking the checkbox.
After filling all the information, click on the Install WordPress button.
Step6: After successful installation, you will get a success installation screen as shown below

You can view your username and password detail added in WordPress. Click on Log In button.
Step 7: After clicking on login, you will get a WordPress Admin Panel as depicted in the following screen.

Enter the username and password which you had mentioned during installation as shown in previous steps and click on the Log In button.
After successful login you will be greeted with an admin dashboard like shown in the snapshot

We will discuss about it next post. This concludes the steps required for the installation of wordpress to your system.


No comments:
Post a Comment