
One of the great things about WordPress is how easy and quick it is to setup. if you’re frequently setting up new sites for your own use and clients, it can become very tedious to go through the whole installation process, change settings to your liking, and install your preferred theme and plugins. Luckily, there are various ways to automate WordPress installs and speed up the creation of custom sites built to your preferences. Many developers use their own scripts to avoid manual WordPress installs, but if you’re not technically minded, this is not the easiest thing in the world. For the rest of us, there is now a simple alternative. WP Quick Install is a pre-written script that will download and install WordPress for you, download and activate plugins and themes, delete the default WordPress content, and setup the wp-config file to your preferences.
Step-by-step Guide to Using WP Quick Install
1. Upload the Script
There are no complicated coding skills required – simply download the script, which comes as a set of files in a directory named wp-quick-install, and upload it using FTP to your web host.Once you’ve finished uploading the files, head to your browser and open up http://www.yourwebsite.com/wp-quick-install/ (obviously, if you’ve uploaded to a subdirectory you’ll need to include this in the path too)
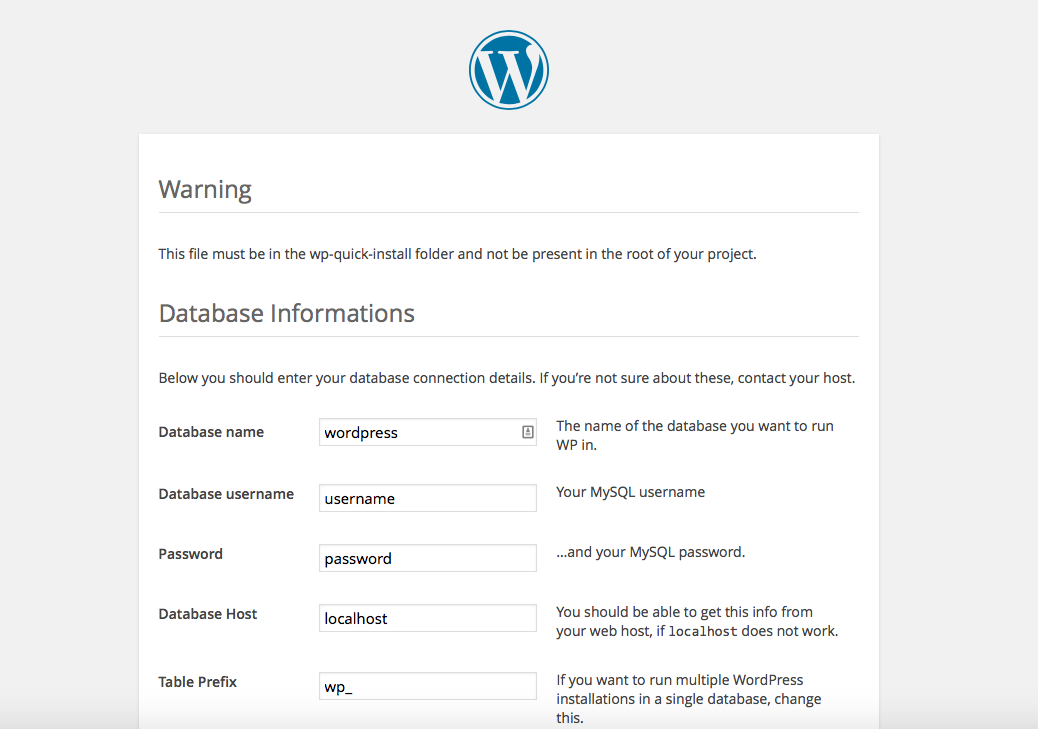
2. Enter Your Database Connection Details
Fill out the first section with information about your database setup. You’ll need to setup the database first from your website management panel, and you should be able to find all other settings such as your MySQL username and password here too. It’s advisable to change the table prefix to something other than “wp_” for security reasons. You also have the option to delete the default WordPress content in this section or leave it as it is.
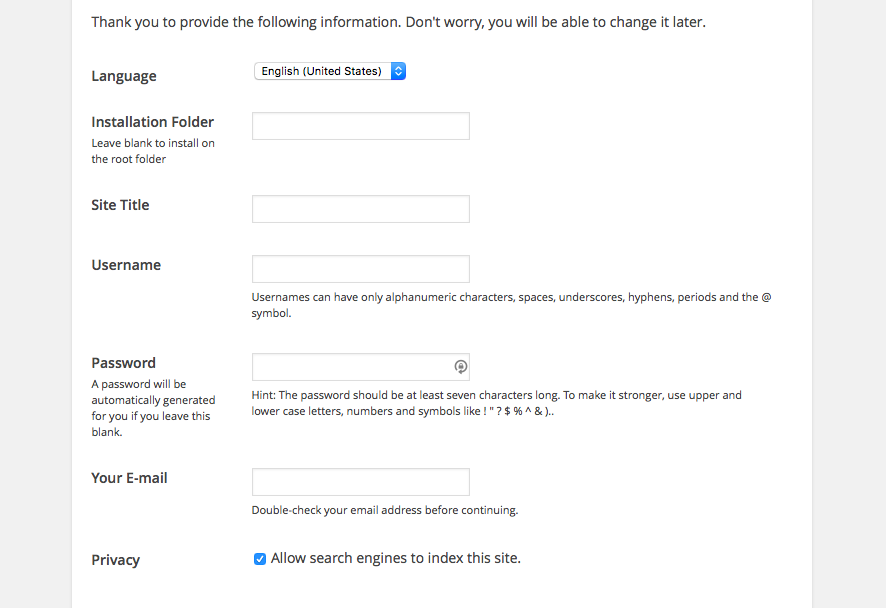
3. Enter WordPress Setup Information
The next section covers basic WordPress setup details and is pretty self-explanatory:
4. Select Theme and Plugins
Now it’s time to set up your theme and extensions (plugins):
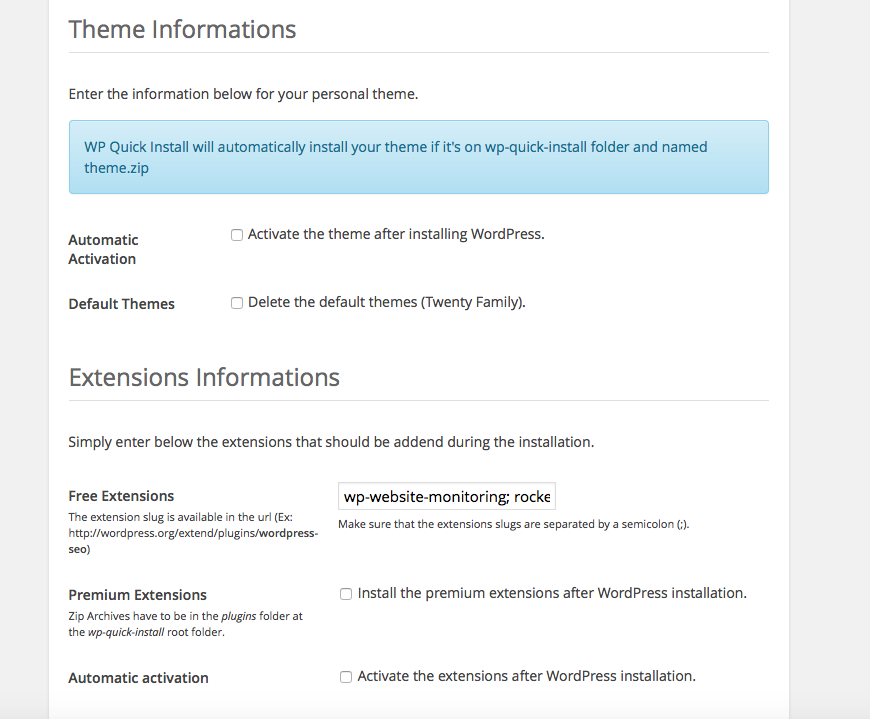
You’ll need to upload your chosen theme to the wp-quick-install folder, and the script will automatically detect and install it, provided it’s in .zip format and named theme.zip.You can also choose to activate the theme automatically and delete the default WordPress themes.To install the plugins you want, you’ll need to find them in the official plugin directory and copy the name of the slug for each plugin you want (from the URL), separated by a semi-colon.
So for example, if you want to install Jetpack, WP Super Cache, and Yoast SEO, you’d enter “jetpack; wp-super-cache; wordpress-seo” into the box. If you have any premium plugins that aren’t available from the WordPress plugin directory, upload them in .zip format directly to the plugins folder of the wp-quick-install directory. You also need to check the box to install the premium extensions. Just as with themes, you have the option of activating the extensions automatically after WordPress is installed.
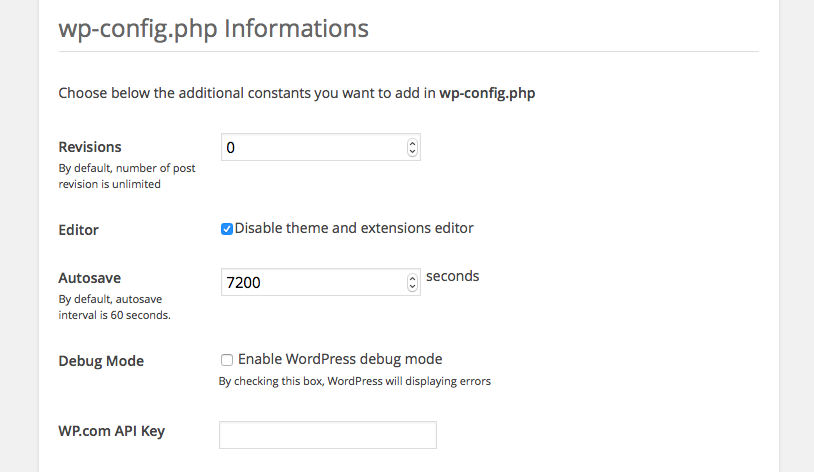
5. Complete the Remaining Form Fields
The remaining settings cover some of the most commonly changed variables within WordPress. You can set Permalinks format, Default images sizes and media upload directory,
Number of post revisions allowed, autosave time, WP.com API key, and choose if you want to disable the theme and plugins editor and enable debug mode:
6. Run the Script
Once you’ve finished filling everything out, hit the “Install WordPress” button, and the script will do its thing. With any luck, you should get a progress bar showing how the installation is going. It should only take a few seconds to complete:
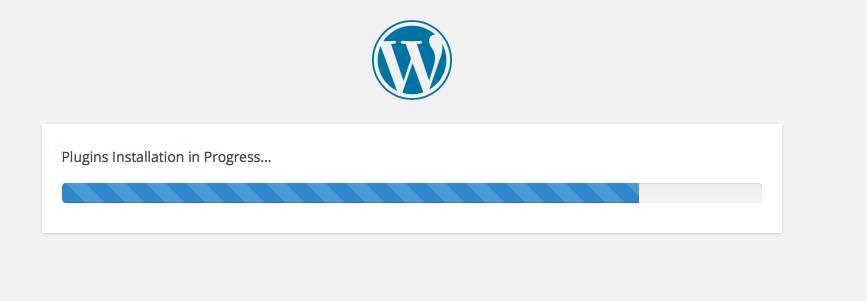
However, if you do get any error messages, go back and double-check your database settings in the first section.
After successful installation, you’ll see this screen:
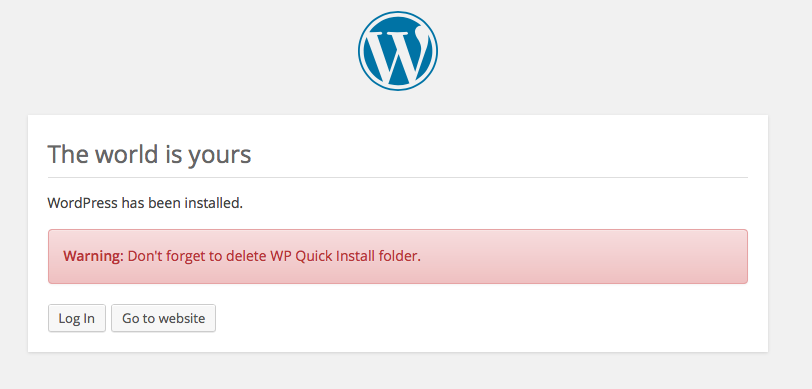
You can then choose to log into your WordPress admin panel or view the site. It’s also important to delete the wp-quick-install folder and contents for security reasons. Honestly, the first time you use this script it may not seem to save you time, especially if you’re used to installing everything from a dashboard. But if you’re constantly setting up new sites and using the same plugins and settings each time, it speeds up the process quite a bit, particularly if you pre-fill the form with your normal settings by editing the data.ini file within the wp-quick-install directory.Unfortunately, you’ll still need to setup and configure the plugins manually and if your theme needs any setup after installation, you’ll need to do that too.


No comments:
Post a Comment