
Default installation of WordPress, comes with only three built-in content types at the backend, i.e. posts, pages, and media. but we might need more than them ,therefore the approach to adding more post types have also diversified. The diversified usage demands more content types because posts, pages, and media are not enough and here is where WordPress custom post type comes in handy.
What is a WordPress Custom Post Type?
Custom Post Types” also known as “Custom Content Types” is the specific type of post types that can be added to your WordPress using a simple function called the register_post_type(). To create a custom post type for any particular theme on WordPress, navigate to function.php file from your WordPress theme directory then add the following code to it.
function create_posttype() {
register_post_type( 'news',
// CPT Options
array(
'labels' => array(
'name' => __( 'news' ),
'singular_name' => __( 'News' )
),
'public' => true,
'has_archive' => false,
'rewrite' => array('slug' => 'news'),
)
);
}
// Hooking up our function to theme setup
add_action( 'init', 'create_posttype' );
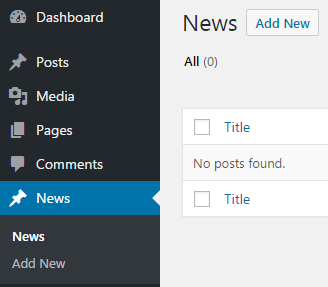
After adding this code, the News post-type will appear in the Admin Area of your WordPress. To see how it will appear at the front-end of your WordPress dashboard, refer to the image below.
When you create custom post types, it is necessary to use init for the hook in add_action(). The register_post_type() function takes the arguments.
/*Custom Post type start*/
function cw_post_type_news() {
$supports = array(
'title', // post title
'editor', // post content
'author', // post author
'thumbnail', // featured images
'excerpt', // post excerpt
'custom-fields', // custom fields
'comments', // post comments
'revisions', // post revisions
'post-formats', // post formats
);
$labels = array(
'name' => _x('news', 'plural'),
'singular_name' => _x('news', 'singular'),
'menu_name' => _x('news', 'admin menu'),
'name_admin_bar' => _x('news', 'admin bar'),
'add_new' => _x('Add New', 'add new'),
'add_new_item' => __('Add New news'),
'new_item' => __('New news'),
'edit_item' => __('Edit news'),
'view_item' => __('View news'),
'all_items' => __('All news'),
'search_items' => __('Search news'),
'not_found' => __('No news found.'),
);
$args = array(
'supports' => $supports,
'labels' => $labels,
'public' => true,
'query_var' => true,
'rewrite' => array('slug' => 'news'),
'has_archive' => true,
'hierarchical' => false,
);
register_post_type('news', $args);
}
add_action('init', 'cw_post_type_news');
/*Custom Post type end*/
$supports: Specifies the post type is compatible and supports all essential features.
$labels: Specifies that the post type is referred properly to the admin area.
$args: Specifies a permalink slug of the news, and a menu position located just beneath the Posts menu.
Now let’s take a look before and after adding features to our WordPress website.
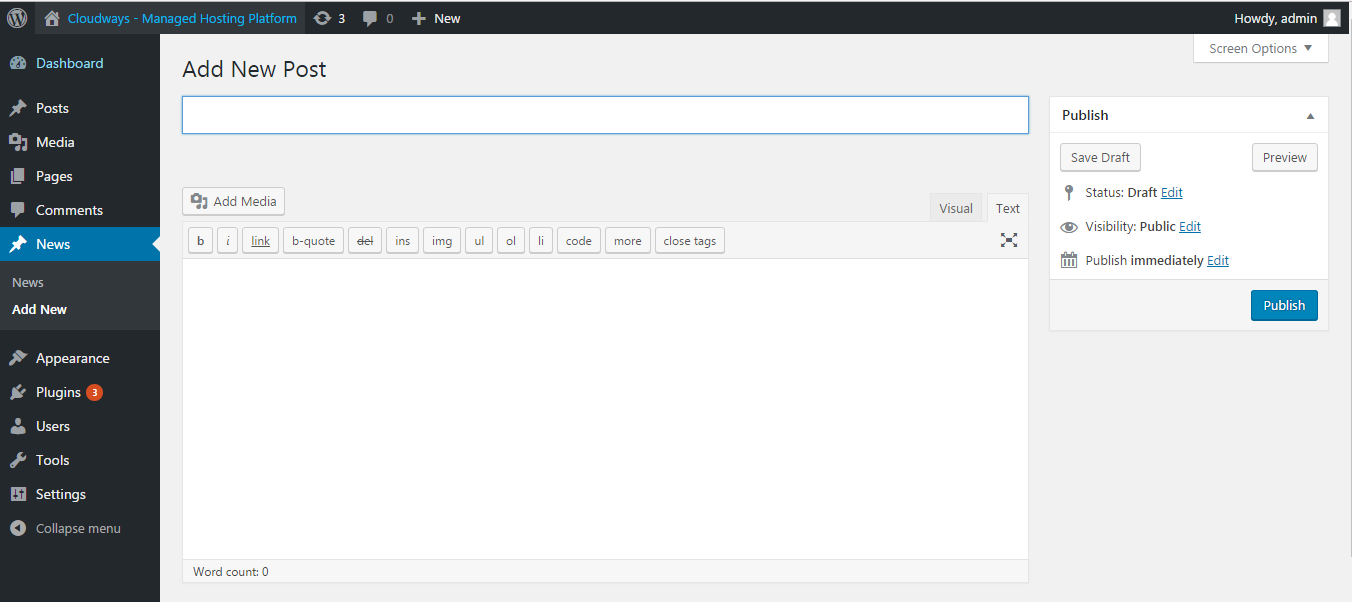
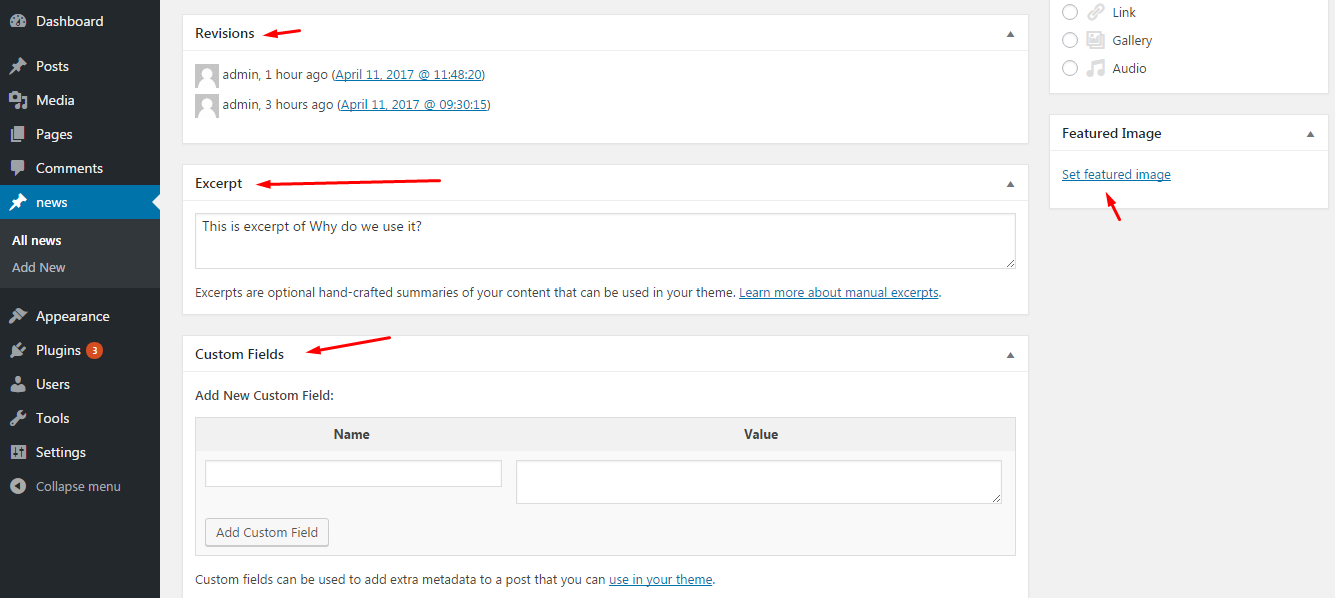
The image is after adding features
The above example tells how you can register WordPress Custom Post Types to the back-end for any theme.


No comments:
Post a Comment