By default, WordPress uses the PHP mail function which often mark your emails as spam. Using an SMTP server is the best way to ensure deliverability of your WordPress emails. So in this article, we’ll show you how to use a free SMTP server to send WordPress emails. The best way to ensure deliverability for your WordPress emails is by using an SMTP server. It is the standard protocol to send emails on the internet. Now in order to connect your WordPress site to use your SMTP server, you need a plugin to make that connection. We’ll be using the WP Mail SMTP plugin which is the best SMTP plugin for WordPress.
The first step is to install and activate the WP Mail SMTP plugin. After activation, you need to go to the WP Mail SMTP » Settings page in your WordPress admin area to set up the plugin.

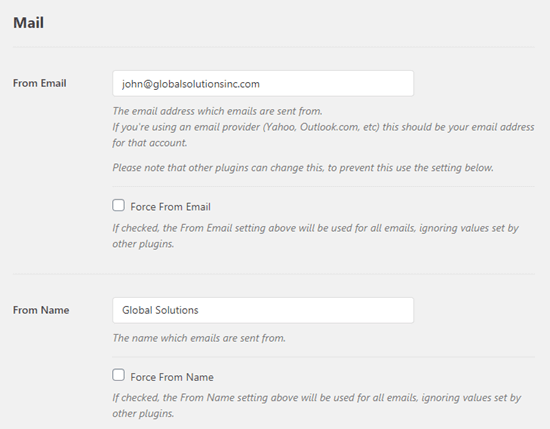
Entering your Froom Email and From Name. WordPress emails will be sent from this email address and name. Leave the ‘Force From Email’ box checked. This leads to insurance of all emails from your WordPress site are sent from that email address, through your SMTP server.
Next, choose an SMTP mailing service. Simply click on the one that you want to use.
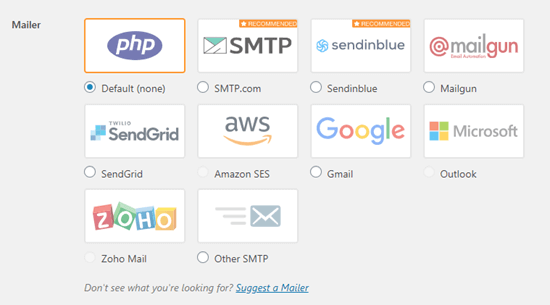
We are going to cover step by step instructions for a number of different free SMTP servers. You need to keep your WP Mail SMTP settings tab open and then follow the instructions for your chosen SMTP server. In this post we will dicuss about
- Sending WordPress Emails Using Sendinblue
Sending WordPress Emails Using Sendinblue SMTP Server
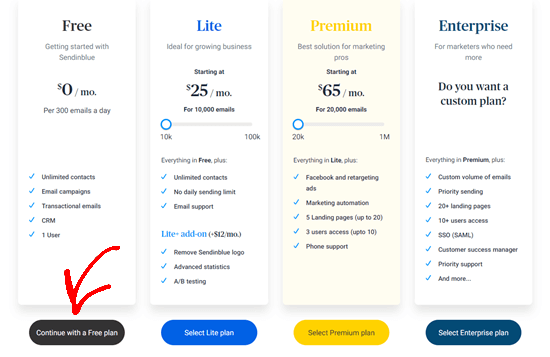
Sendinblue lets you send up to 300 free emails per day from your website.First, you need to create an account at the Sendinblue website. After confirming your email address, you’ll be asked to choose a Sendinblue pricing plan.Simply click on the ‘Continue with a Free plan’ button.
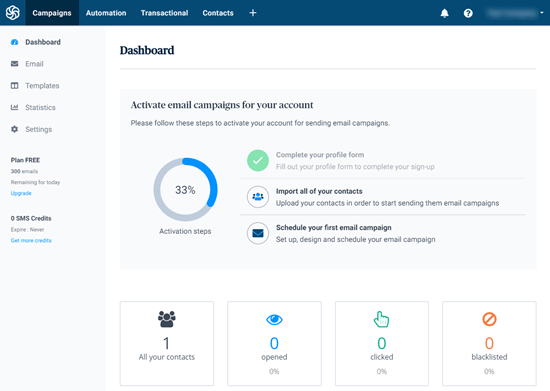
You will receive a text message with a confirmation code to enter. Next, you’ll see your Sendinblue dashboard.
Before going further, you need to create a subdomain at your website, such as mail1.yourdomain.com.
To do this, log in to your web hosting or domain registrar account, and then follow their instructions for adding a subdomain.
Simply enter the subdomain you want to use (e.g. mail1) and then click on the create button to continue. Bluehost will add the subdomain to your hosting.
After creating the subdomain, you need to add it into your Sendinblue account.
Adding Your Subdomain to Sendinblue
In your Sendinblue account, you need to go to the Settings page. On this page, scroll to the ‘Your Senders and Domains’ section and click the ‘Configure’ button below it.
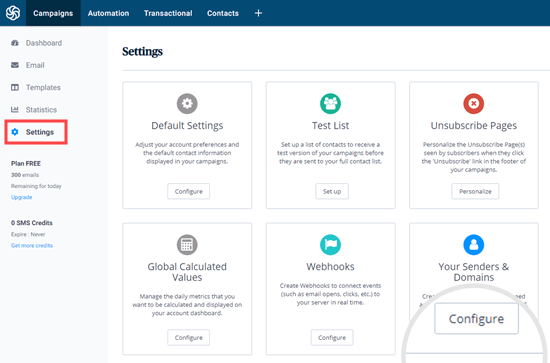
Next, click the Domains tab then the ‘Add a New Domain’ button.

Go ahead and enter your whole subdomain, such as mail1.yoursite.com. Make sure you check the box to confirm you want to use the domain name to digitally sign your emails. Then, click the Save button.
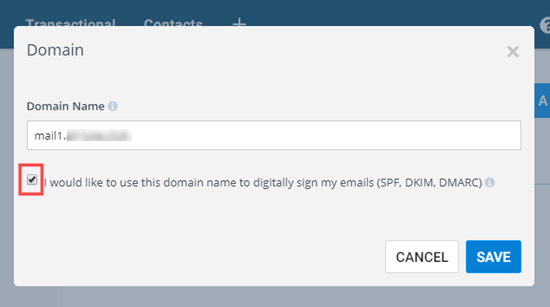
After saving, you will see a popup listing ways for you to verify your domain. The default method is to host a file, but this requires you to create the HTML file and upload it via FTP.
We recommend instead using the ‘Add a DNS entry’ method. This gives you a special code that you need to use to verify your subdomain.
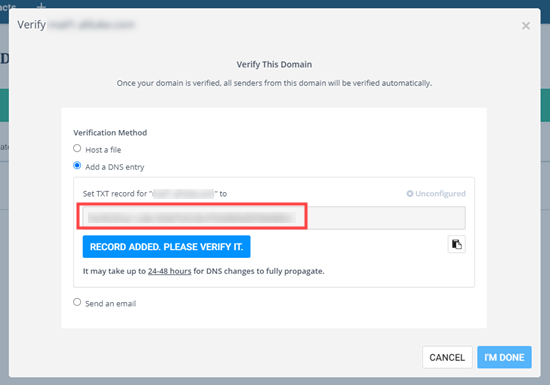
Tip: Don’t worry if you close this popup by mistake. You can get back to it by clicking the ‘Verify This Domain’ link next to your subdomain.

Next, you need to open the DNS settings for your domain in your web hosting account. Your web host should have instructions for this.
In Bluehost, you need to scroll down your DNS records to the TXT section.

Then, create a new DNS TXT record.
For the Host Record (sometimes called Host or Name) you need to enter your subdomain, e.g. mail1.yourdomain.com. Depending on your web host, it may already be entered for you, or you may need to enter all or part of it.
For the Value (also called TXT Value or TXT data) you just need to copy the special code from Sendinblue.
Make sure you save your DNS TXT record. After doing so, return to Sendinblue and click the ‘Record Added. Please Verify It’ button.
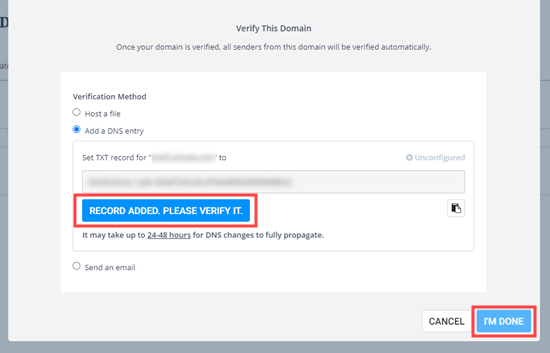
Tip: DNS changes can take as much as 24 – 48 hours to propagate across the internet. If the verification fails, try again in a few hours.
After doing this, you also need to enter two more DNS TXT records so that Sendinblue can authenticate the emails that are being sent from your domain. This improves deliverability.
In Sendinblue, click the ‘Manage’ dropdown next to your domain, then select the ‘Authenticate this domain’ option.
You will then see a popup with details of the DNS records that you need to add. You just need to add the first 2 DNS records. The 3rd is the one you have added already and the 4th is not needed.
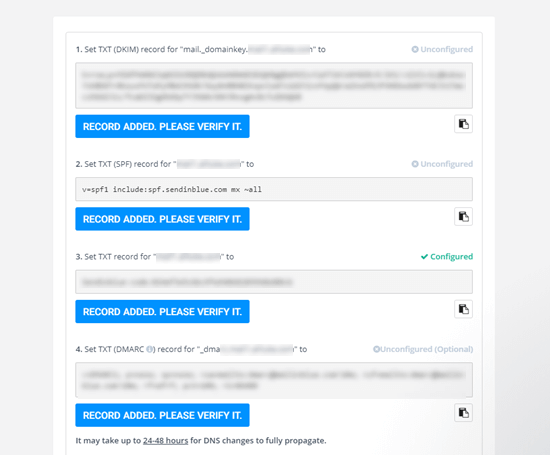
Simply add these to your domain in your web hosting account or domain registrar in the same way as before. Then, go ahead and click the ‘Record Added. Please Verify It’ button for each one.
Now, you just need to finish enabling Sendinblue on your WordPress site. Simply go back to the WP Mail SMTP Settings page that you opened up earlier, and find the API key box.
Then, click the ‘Get v3 API Key’ link.
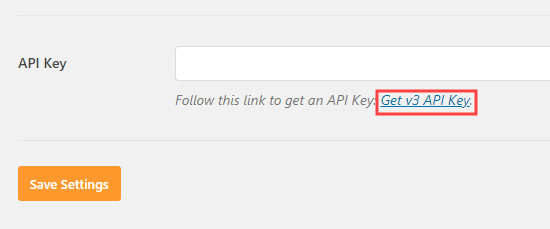
This link will open up the correct page of your Sendinblue account in a new tab. Here, you just need to copy the API key.
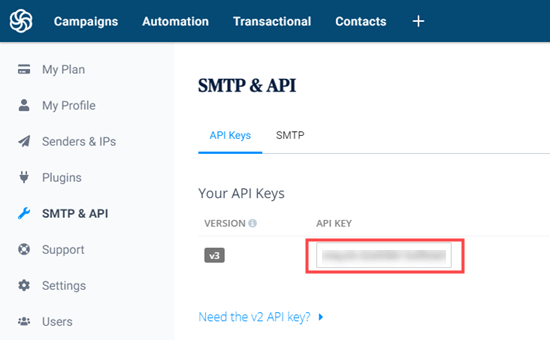
Once you’ve copied it, return to WP Mail SMTP and paste in the API key.
Make sure you click the ‘Save Settings’ after doing so.
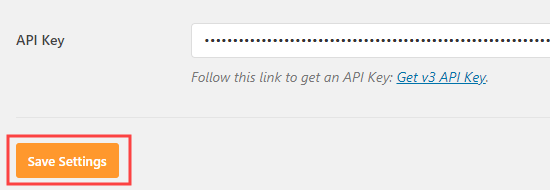
Everything is now set up. You just need to wait for Sendinblue to activate your account.
Now, it’s time to go ahead and test that your email is working.


No comments:
Post a Comment