
5. Setting up Visual Studio Code for Flutter Development: Quick and Easy Installation Guide
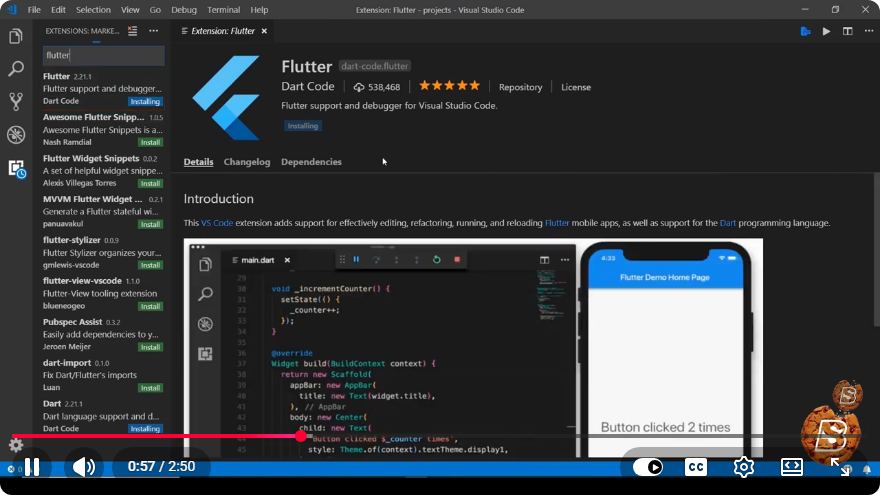
Setting Up Visual Studio Code for Flutter Development: A Quick and Easy Installation Guide
Flutter is an open-source UI software development kit created by Google for building natively compiled applications for mobile, web, and desktop from a single codebase. Visual Studio Code (VS Code) is one of the most popular code editors used for Flutter development due to its lightweight nature and powerful features.
In this blog post, we’ll walk you through the steps to set up Visual Studio Code for Flutter development quickly and easily. Let's dive in!
Prerequisites
Before you start, ensure you have the following installed on your machine:
- Flutter SDK: Make sure to download and install the Flutter SDK from the official Flutter website.
- Visual Studio Code: If you haven’t already, download and install Visual Studio Code from the official website.
- Dart SDK: The Dart SDK is included with Flutter, but if you want to work with Dart specifically, you can install it separately from the Dart website.
Step 1: Install the Flutter and Dart Plugins
Once you have Visual Studio Code installed, the next step is to install the Flutter and Dart plugins, which provide tooling for Flutter development.
1.1 Open Extensions View
- Launch Visual Studio Code.
- Click on the Extensions icon in the Activity Bar on the side of the window or press
Ctrl+Shift+X.
1.2 Search for Flutter and Dart
- In the Extensions view, type
Flutterin the search bar. - Click on the
Flutterextension by Dart Code (it should show as the top result). - Click the
Installbutton.
Repeat the same steps for the Dart extension:
- Search for
Dartin the Extensions view. - Click on the
Dartextension and install it.
Step 2: Configure the Flutter SDK Path
To ensure that Visual Studio Code recognizes the Flutter SDK, you need to configure the SDK path.
2.1 Open Settings
- Press
Ctrl+,or go to the menu and selectFile > Preferences > Settings. - In the search bar, type
flutter sdk.
2.2 Set the SDK Path
Click on
Edit in settings.json.Add the following line, replacing
<path-to-flutter-sdk>with the actual path where you installed the Flutter SDK:"dart.flutterSdkPath": "<path-to-flutter-sdk>"
For example, on Windows, it might look like this:
"dart.flutterSdkPath": "C:\\src\\flutter"
Step 3: Create Your First Flutter Project
You’re now ready to create your first Flutter project!
3.1 Open Command Palette
- Press
Ctrl+Shift+Pto open the Command Palette. - Type
Flutter: New Projectand select it.
3.2 Select Project Type
- Choose
Flutter Application. - Specify the project name and select a location to save it.
3.3 Wait for Dependencies
Once the project is created, VS Code will automatically install the required dependencies. This may take a few moments.
Step 4: Run Your Flutter Application
With your project set up, it's time to run it.
4.1 Open the main.dart File
Navigate to the lib folder in your project directory and open the main.dart file.
4.2 Choose a Device
- Make sure you have a device connected or an emulator running.
- In the lower right corner, select the device you want to run your application on.
4.3 Start Debugging
Press F5 or click on the Run icon on the sidebar, then select Start Debugging. Your Flutter app should launch in the selected device or emulator!
Conclusion
You have now successfully set up Visual Studio Code for Flutter development! With the Flutter and Dart extensions installed, you can take full advantage of the powerful features VS Code offers, such as IntelliSense, debugging, and integrated terminal support.
Happy coding, and enjoy building beautiful apps with Flutter! If you have any questions or need further assistance, feel free to leave a comment below.
Connect with SkillBakery Studios
Explore more tutorials, tools, and resources:
Posted by SkillBakery Studios


 Hello, my name is Jack Sparrow. I'm a 50 year old self-employed Pirate from the Caribbean.
No comments:
Post a Comment