
Vue.js 101 : Creating our Completed Todo Component
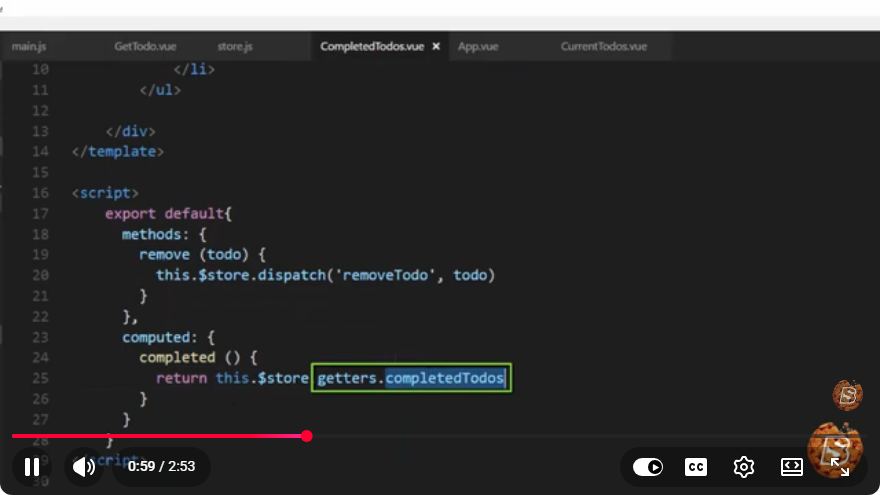
Vue.js 101: Creating Our Completed Todo Component
In this tutorial, we will walk through the process of creating a completed Todo component using Vue.js. This guide is inspired by the concise and informative YouTube video titled "Vue.js 101: Creating our Completed Todo Component." Whether you are a beginner just getting started with Vue.js or an experienced developer looking to refresh your skills, this blog post will provide you with clear, step-by-step instructions.
What is Vue.js?
Vue.js is a progressive JavaScript framework used for building user interfaces. It allows developers to create dynamic, reactive applications and is particularly well-suited for single-page applications. Vue's component-based architecture makes it easy to break down complex interfaces into manageable pieces.
Setting Up Your Environment
Before we begin creating our completed Todo component, ensure you have the following prerequisites:
Node.js: Download and install Node.js from the official website.
Vue CLI: Install Vue CLI globally by running the following command in your terminal:
npm install -g @vue/cliCreate a New Vue Project: Create a new Vue project using Vue CLI:
vue create todo-appNavigate to Your Project Directory:
cd todo-appRun the Development Server:
npm run serve
Now that your environment is set up, let’s create our Todo component!
Creating the Completed Todo Component
Step 1: Define the Component Structure
Create a new file named CompletedTodo.vue in the src/components directory. This file will hold our completed Todo component’s template, script, and style.
<template>
  <div class="completed-todo">
    <input type="checkbox" v-model="completed" />
    <span class="todo-text">{{ text }}</span>
    <button @click="removeTodo">Remove</button>
  </div>
</template>

<script>
export default {
  name: 'CompletedTodo',
  props: {
    text: {
      type: String,
      required: true
    },
    completed: {
      type: Boolean,
      default: false
    }
  },
  methods: {
    removeTodo() {
      this.$emit('remove');
    }
  }
}
</script>

<style scoped>
.completed-todo {
  display: flex;
  align-items: center;
  margin: 10px 0;
}

.todo-text {
  margin-left: 10px;
  text-decoration: line-through;
}
</style>
Breakdown of the Component
- Template: The HTML structure includes a checkbox to indicate completion, the Todo text, and a button to remove the Todo item.
- Script: The component accepts two props:
textfor the Todo description andcompletedto indicate its status. TheremoveTodomethod emits an event to notify the parent component when it's time to remove the Todo. - Style: Basic styling is applied to align elements and add a strikethrough effect for completed tasks.
Step 2: Integrate the Component
Next, we need to integrate our CompletedTodo component into the main application. Open the src/App.vue file and update it to include our new component:
<template>
  <div id="app">
    <h1>Your Todos</h1>
    <CompletedTodo
      v-for="(todo, index) in todos"
      :key="index"
      :text="todo.text"
      :completed="todo.completed"
      @remove="removeTodo(index)"
    />
  </div>
</template>

<script>
import CompletedTodo from './components/CompletedTodo.vue';

export default {
  name: 'App',
  components: {
    CompletedTodo
  },
  data() {
    return {
      todos: [
        { text: 'Learn Vue.js', completed: true },
        { text: 'Build a Todo App', completed: true },
      ]
    };
  },
  methods: {
    removeTodo(index) {
      this.todos.splice(index, 1);
    }
  }
}
</script>

<style>
#app {
  text-align: center;
}
</style>
Understanding the Integration
- Template: We loop through the
todosarray and render aCompletedTodocomponent for each Todo item, passing the necessary props and handling the removal of items with an event. - Script: We import the
CompletedTodocomponent and define atodosarray in the data function. TheremoveTodomethod is responsible for removing a Todo item from the list.
Conclusion
Congratulations! You have successfully created a completed Todo component in Vue.js. This component allows you to display completed tasks, check them off, and remove them from the list.
Next Steps
- Enhance Functionality: Consider adding features such as editing Todo items and filtering by completed status.
- Explore Vue Router: Learn how to navigate between different views in your application using Vue Router.
- State Management: Investigate Vuex for managing state in larger applications.
For further learning, check out the Vue.js documentation to dive deeper into the framework's capabilities. Happy coding!
Connect with SkillBakery Studios
Explore more tutorials, tools, and resources:
Posted by SkillBakery Studios


 Hello, my name is Jack Sparrow. I'm a 50 year old self-employed Pirate from the Caribbean.
No comments:
Post a Comment