
Vue.js 101 : Registering our Component 58 seconds
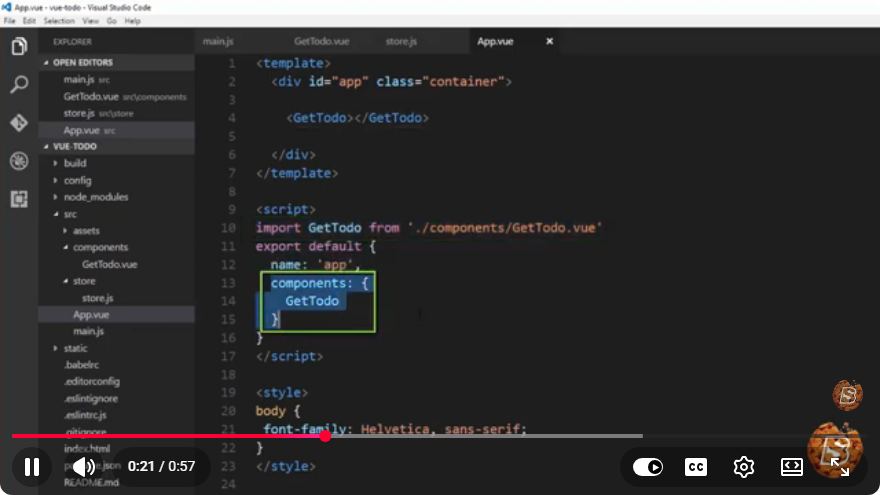
Vue.js 101: Registering Our Component in 58 Seconds
Vue.js is a progressive JavaScript framework used for building user interfaces. One of the fundamental concepts in Vue.js is the idea of components. Components help in creating reusable UI blocks, making your code more maintainable and organized. In this blog post, we will cover how to register components in Vue.js, drawing insights from the video titled "Vue.js 101: Registering our Component in 58 seconds."
What is a Component?
A component in Vue.js is essentially a Vue instance with pre-defined options. They can be thought of as custom HTML elements that encapsulate functionality and styles. By using components, developers can build complex applications more easily by breaking them down into smaller, manageable pieces.
Why Register Components?
Before you can use a component in your Vue instance, you must register it. Component registration allows Vue to know about the components you’re using, enabling it to render them correctly in the DOM.
There are two main types of component registration in Vue.js:
- Global Registration: Making a component available throughout your application.
- Local Registration: Making a component available only within a specific component.
In this tutorial, we’ll focus on local registration, which is a common practice in many applications.
How to Register a Component Locally
Let's walk through the steps to register a component locally in Vue.js.
Step 1: Create a Component
First, define your component. Components can be defined as a JavaScript object or a Vue single-file component (SFC). Here’s a simple example of a component defined as a JavaScript object:
// MyComponent.js
export default {
  template: `<div>Hello, I am a component!</div>`
}
Step 2: Import the Component
Next, you need to import the component into the parent component where you want to use it. This is done using the ES6 import statement.
import MyComponent from './MyComponent.js';
Step 3: Register the Component
Now, you can register the imported component within the components property of your parent component. Here’s how you do it:
export default {
  components: {
    MyComponent
  },
  template: `
    <div>
      <h1>Welcome to my Vue app!</h1>
      <MyComponent />
    </div>
  `
}
Full Example
Here’s how the complete parent component might look, including the registration of MyComponent:
<template>
  <div>
    <h1>Welcome to my Vue app!</h1>
    <MyComponent />
  </div>
</template>

<script>
import MyComponent from './MyComponent.js';

export default {
  components: {
    MyComponent
  }
}
</script>

<style>
/* Add your styles here */
</style>
Conclusion
Registering components in Vue.js is a straightforward process that allows you to build intricate applications efficiently. By understanding local component registration, you can keep your components organized and encapsulated, which enhances the overall maintainability of your code.
For more advanced topics, consider exploring global component registration, props, and Vue's lifecycle hooks. As you continue your journey with Vue.js, remember that components are the building blocks of your applications. Happy coding!
If you found this tutorial helpful, check out the original video here for a quick, visual reference!
Connect with SkillBakery Studios
Explore more tutorials, tools, and resources:
Posted by SkillBakery Studios


 Hello, my name is Jack Sparrow. I'm a 50 year old self-employed Pirate from the Caribbean.
No comments:
Post a Comment