
Lecture-9: Run AI Models Locally with Ollama
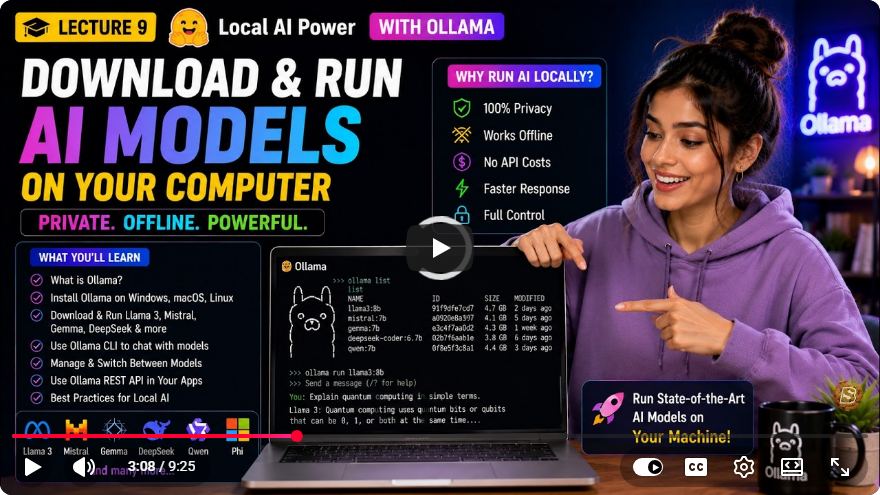
Running AI Models Locally with Ollama: A Comprehensive Guide
In the rapidly evolving world of artificial intelligence, the ability to run AI models locally on your own machine can unlock new opportunities for developers and enthusiasts alike. In this tutorial, we will explore Ollama, a free and open-source tool designed to facilitate the downloading and running of large language models entirely offline. This guide will walk you through the installation process, model management, and how to interact with these models using JavaScript.
What is Ollama?
Ollama is a powerful tool that allows users to download and run AI models locally. It provides a seamless experience for developers who seek full control over their AI applications without relying on external APIs. Here are some of the key features of Ollama:
- Offline Operation: Run models entirely on your machine without internet dependency.
- Simple API: Access models using an API compatible with OpenAI's format.
- Large Models: Work with models that are impractical to run in a web browser.
- Privacy: Keep your data secure, as it never leaves your system.
Installing Ollama
To get started with Ollama, you need to install it on your computer. Follow these steps for installation:
Visit the Official Website: Go to ollama.com and download the version that corresponds to your operating system (Windows, macOS, or Linux).
Install Ollama: After downloading, open your command line interface (CLI). For Windows users, you can use PowerShell. Execute the installation command. For example, in PowerShell, you might run:
Invoke-WebRequest -Uri https://ollama.com/download -OutFile ollama-installer.exe; Start-Process .\ollama-installer.exeVerify Installation: Once the installation completes, verify the installed version by running:
ollama --versionYou should see output similar to this:
Ollama version 0.32.1
Downloading Models
With Ollama installed, you can now download AI models effortlessly. Use the following command to pull a model:
ollama pull <model-name>
For example, to download a model named "llama-3.2", you would use:
ollama pull llama-3.2
After the model downloads, you can list all installed models by executing:
ollama list
This command will display details such as model name, ID, size, and modification date.
Running a Model
To run a model locally in your terminal, use the following command:
ollama run <model-name>
For example:
ollama run llama-3.2:1B
Once the model is running, you can interact with it. Type a question or prompt, like "What can you help me with?" and receive a response directly in the terminal.
To exit the chat, simply type "Bye".
Integrating Ollama with JavaScript
Ollama runs a local server on port 11434, exposing an OpenAI-compatible API. This allows you to call Ollama from JavaScript in a similar manner as remote models.
Example HTML and JavaScript Setup
Here’s a simple example of how to set up a front-end interface to interact with the model:
HTML File (index.html)
<!DOCTYPE html>
<html lang="en">
<head>
    <meta charset="UTF-8">
    <meta name="viewport" content="width=device-width, initial-scale=1.0">
    <title>Ollama Local Chat</title>
    <script src="script.js" defer></script>
</head>
<body>
    <h1>Chat with Ollama</h1>
    <textarea id="user-input" placeholder="Type your message here..."></textarea>
    <button id="send-button">Send</button>
    <div id="response"></div>
</body>
</html>
JavaScript File (script.js)
const sendButton = document.getElementById('send-button');
const userInput = document.getElementById('user-input');
const responseDiv = document.getElementById('response');

sendButton.addEventListener('click', async () => {
    const message = userInput.value;
    const apiUrl = 'http://localhost:11434/v1/chat/completions';

    const response = await fetch(apiUrl, {
        method: 'POST',
        headers: {
            'Content-Type': 'application/json',
        },
        body: JSON.stringify({
            model: 'llama-3.2:1B',
            messages: [{ role: 'user', content: message }],
        }),
    });

    const data = await response.json();
    responseDiv.innerText = data.choices[0].message.content;
    userInput.value = '';
});
Important Note
Due to browser security policies, direct calls to localhost from the front-end can often fail. For production applications, it's advisable to set up a small backend using Node.js or Express that interfaces with Ollama. This backend can then be called from your front-end application.
Advantages and Limitations of Using Ollama
Advantages
- Complete Privacy: Data stays on your machine.
- Offline Functionality: No need for an internet connection.
- Larger Models: Ability to work with more capable models.
- Cost-Effective: Free to use after model downloads.
- OpenAI Compatible API: Familiarity for developers.
Limitations
- Hardware Requirements: Requires a reasonably powerful computer.
- Initial Download Size: Models can take significant time and disk space to download.
- Performance Variability: Performance depends on CPU, GPU, and RAM.
- Back-End Requirement: Front-end applications may need a back-end proxy due to CORS issues.
Managing Models
If you wish to remove a model, use the following command:
ollama remove <model-name>
For instance, to remove the "llama-3.2" model:
ollama remove llama-3.2
Verify successful removal by checking the list of installed models:
ollama list
Conclusion
In this tutorial, we explored Ollama, a powerful tool for running AI models locally. We covered installation, model management, and how to interact with models through a simple JavaScript interface. With Ollama, developers can harness the power of AI while maintaining privacy and control over their data.
If you found this guide helpful, consider exploring the capabilities of different models available on Ollama, and don't hesitate to combine various approaches to optimize your applications. Happy coding!
Connect with SkillBakery Studios
Explore more tutorials, tools, and resources:
Posted by SkillBakery Studios


 Hello, my name is Jack Sparrow. I'm a 50 year old self-employed Pirate from the Caribbean.
No comments:
Post a Comment