
MoonJs - Hello Moon - Example
MoonJs - Hello Moon: A Quick Guide
MoonJs is a lightweight JavaScript framework that simplifies the process of building responsive user interfaces. In this blog post, we will explore the fundamentals of MoonJs, using the "Hello Moon" example from the video titled "MoonJs - Hello Moon - Example 2 minutes, 1 second." We will break down the essential components of the framework and demonstrate how to create a simple application step by step.
What is MoonJs?
MoonJs is a minimalistic framework inspired by Vue.js that allows developers to create reactive web applications with ease. Its core philosophy is to provide a simple API that leverages the power of reactive programming while keeping the bundle size small. This makes it an excellent choice for projects where performance is a priority.
Getting Started with MoonJs
Prerequisites
Before diving into the tutorial, ensure you have the following:
- Basic knowledge of HTML, CSS, and JavaScript
- A code editor (e.g., Visual Studio Code, Sublime Text)
- A web browser (e.g., Chrome, Firefox)
Setting Up MoonJs
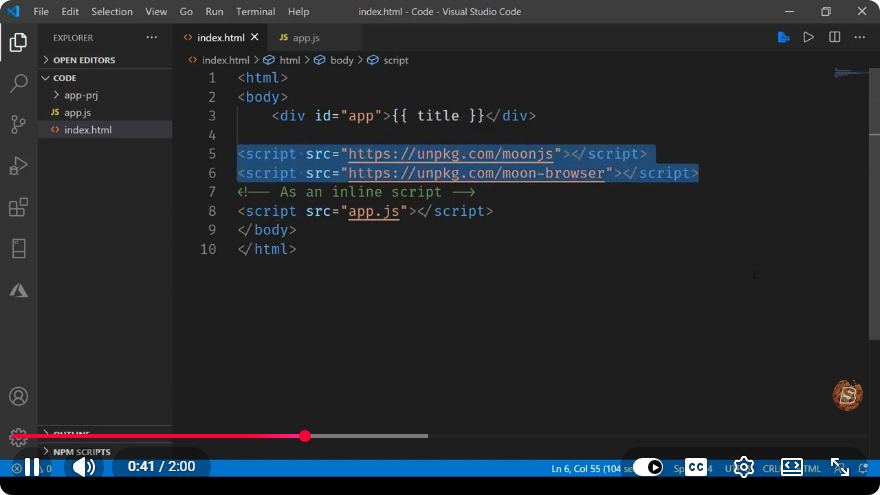
To get started, you need to include the MoonJs library in your project. You can do this by adding the following script tag to the <head> section of your HTML file:
<!DOCTYPE html>
<html lang="en">
<head>
    <meta charset="UTF-8">
    <meta name="viewport" content="width=device-width, initial-scale=1.0">
    <title>Hello Moon Example</title>
    <script src="https://unpkg.com/moonjs/dist/moon.min.js"></script>
</head>
<body>
    <div id="app"></div>
    <script>
        // Your MoonJs code will go here
    </script>
</body>
</html>
This code snippet sets up a basic HTML structure and includes the MoonJs library from a CDN.
Building a Simple "Hello Moon" Application
Now that we have MoonJs set up, let's create a simple application that displays a greeting message. Below are the steps to achieve this.
Step 1: Create a Moon Component
A component in MoonJs is a reusable piece of UI that can manage its own state. Let's define a simple component that will display "Hello, Moon!".
const App = {
    data() {
        return {
            message: "Hello, Moon!"
        };
    },
    template: `<h1>{{ message }}</h1>`
};
In this code:
- data(): A function that returns an object containing our component's state. Here, we have a single property,
message. - template: The HTML structure that defines how our component will be rendered. We are using a template literal to insert the
messagedynamically.
Step 2: Mount the Component
Next, we need to mount our component to the HTML element with the ID app. This is done using the Moon.mount method.
Moon.mount('#app', App);
This line of code tells MoonJs to render the App component inside the <div id="app"></div> element.
Complete Code Example
Here’s the complete code for our "Hello Moon" application:
<!DOCTYPE html>
<html lang="en">
<head>
    <meta charset="UTF-8">
    <meta name="viewport" content="width=device-width, initial-scale=1.0">
    <title>Hello Moon Example</title>
    <script src="https://unpkg.com/moonjs/dist/moon.min.js"></script>
</head>
<body>
    <div id="app"></div>
    <script>
        const App = {
            data() {
                return {
                    message: "Hello, Moon!"
                };
            },
            template: `<h1>{{ message }}</h1>`
        };

        Moon.mount('#app', App);
    </script>
</body>
</html>
Step 3: Run the Application
To see the result, save your HTML file and open it in your web browser. You should see a heading that says "Hello, Moon!" displayed on the page.
Conclusion
In this tutorial, we introduced MoonJs and walked through creating a simple "Hello Moon" application. We learned how to set up MoonJs, define a component, and render it in the browser. This foundational knowledge equips you to start building more complex applications using MoonJs.
For more advanced features and capabilities of MoonJs, consider exploring the official documentation and experimenting with different components and data bindings. Happy coding!
Connect with SkillBakery Studios
Explore more tutorials, tools, and resources:
Posted by SkillBakery Studios


 Hello, my name is Jack Sparrow. I'm a 50 year old self-employed Pirate from the Caribbean.
No comments:
Post a Comment