
MVVM with Knockout - Code Demo - Master KnockoutJs-Web Development 5 minutes
MVVM with Knockout.js: A Quick Guide
In the world of web development, the Model-View-ViewModel (MVVM) pattern offers a structured way to separate concerns within your application. This tutorial will guide you through implementing MVVM using Knockout.js, a powerful JavaScript library that facilitates two-way data binding and simplifies the management of complex UIs.
What is MVVM?
The MVVM pattern is a software architectural pattern that enhances the separation of the user interface (UI) and business logic. It consists of three main components:
- Model: Represents the data and business logic of the application.
- View: Represents the UI elements that users interact with.
- ViewModel: Acts as a bridge between the Model and the View, handling the presentation logic and data binding.
Why Use Knockout.js?
Knockout.js simplifies the implementation of the MVVM pattern by providing:
- Two-Way Data Binding: Automatically synchronizes data between the Model and the View.
- Declarative Bindings: Allows you to define how UI elements relate to the underlying data.
- Dependency Tracking: Automatically updates the UI when the underlying data changes.
Setting Up Your Environment
Before we dive into the code, ensure you have the following:
- A modern web browser.
- A code editor (like Visual Studio Code).
- Basic knowledge of HTML, JavaScript, and CSS.
Step 1: Include Knockout.js
You can include Knockout.js in your project by either downloading it or linking to it via a CDN. For simplicity, we will use a CDN.
<!DOCTYPE html>
<html lang="en">
<head>
    <meta charset="UTF-8">
    <meta name="viewport" content="width=device-width, initial-scale=1.0">
    <title>MVVM with Knockout.js</title>
    <script src="https://cdnjs.cloudflare.com/ajax/libs/knockout/3.5.1/knockout-min.js"></script>
</head>
<body>
    <!-- Your HTML content will go here -->
</body>
</html>
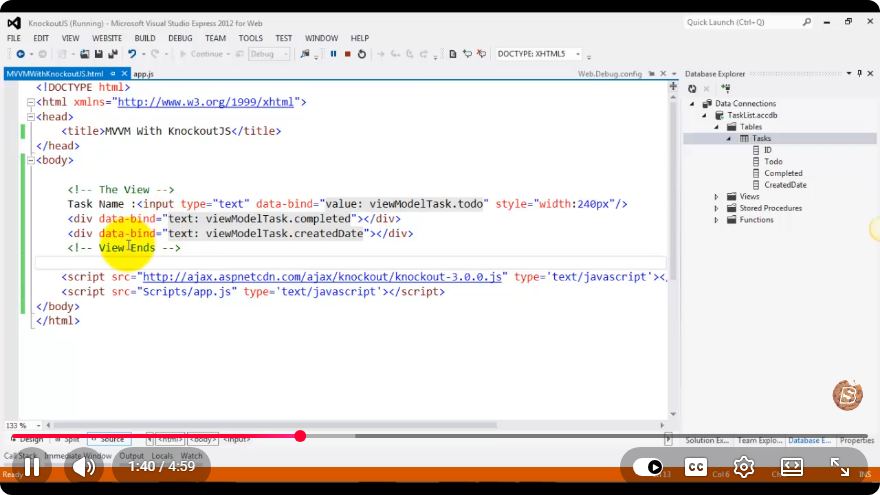
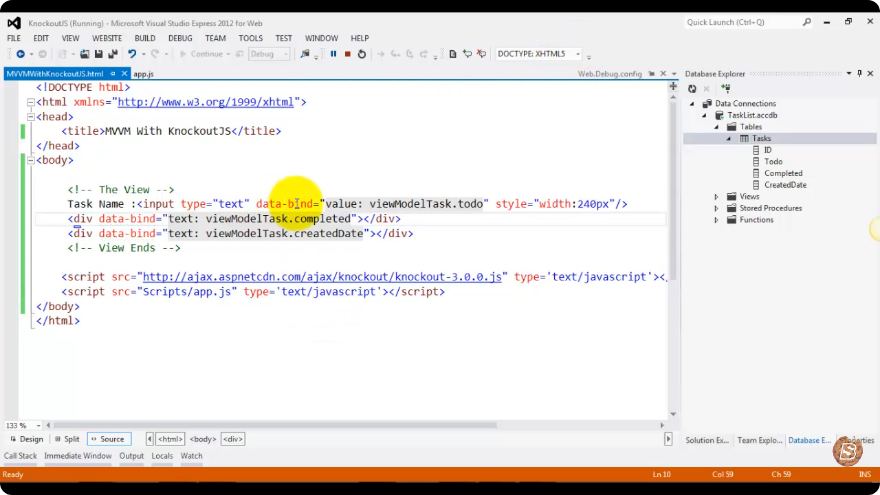
Step 2: Create the HTML Structure
Let's create a simple UI that allows users to enter their name and display a greeting.
<body>
    <div>
        <h2>Welcome to MVVM with Knockout.js</h2>
        <label for="nameInput">Enter your name:</label>
        <input type="text" id="nameInput" data-bind="value: name" />
        <h3 data-bind="text: greeting"></h3>
    </div>
</body>
Step 3: Define the ViewModel
Now, let's create the ViewModel that will hold our data and logic. We'll define a name observable and a computed observable greeting that updates whenever the name changes.
<script>
    function AppViewModel() {
        // Observable to hold the name
        this.name = ko.observable('');

        // Computed observable for greeting
        this.greeting = ko.computed(() => {
            return this.name() ? `Hello, ${this.name()}!` : 'Please enter your name.';
        });
    }

    // Apply bindings when the document is ready
    ko.applyBindings(new AppViewModel());
</script>
Full HTML Example
Combining all the elements together, your complete HTML file should look like this:
<!DOCTYPE html>
<html lang="en">
<head>
    <meta charset="UTF-8">
    <meta name="viewport" content="width=device-width, initial-scale=1.0">
    <title>MVVM with Knockout.js</title>
    <script src="https://cdnjs.cloudflare.com/ajax/libs/knockout/3.5.1/knockout-min.js"></script>
</head>
<body>
    <div>
        <h2>Welcome to MVVM with Knockout.js</h2>
        <label for="nameInput">Enter your name:</label>
        <input type="text" id="nameInput" data-bind="value: name" />
        <h3 data-bind="text: greeting"></h3>
    </div>

    <script>
        function AppViewModel() {
            this.name = ko.observable('');
            this.greeting = ko.computed(() => {
                return this.name() ? `Hello, ${this.name()}!` : 'Please enter your name.';
            });
        }

        ko.applyBindings(new AppViewModel());
    </script>
</body>
</html>
Conclusion
In just a few lines of code, you have implemented a simple MVVM application using Knockout.js. This structure allows for clean separation between your UI and business logic, facilitating easier maintenance and scalability.
Explore more features of Knockout.js, such as custom bindings, templating, and more complex data structures, to enhance your web applications. Happy coding!
Connect with SkillBakery Studios
Explore more tutorials, tools, and resources:
Posted by SkillBakery Studios


No comments:
Post a Comment