
SQLServer 2019 - Creating Composite Keys (Primary Key) using SQL Server Management Studio
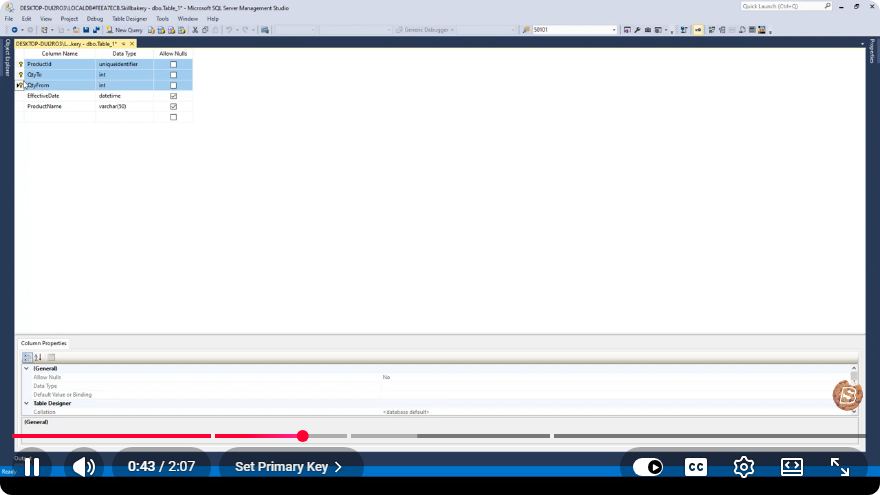
Creating Composite Keys (Primary Key) in SQL Server 2019 Using SQL Server Management Studio
In relational database design, primary keys play a crucial role in ensuring data integrity and uniqueness. In SQL Server 2019, you can create composite primary keys that consist of two or more columns. This blog post will guide you through the process of creating composite primary keys using SQL Server Management Studio (SSMS).
What is a Composite Key?
A composite key is a combination of two or more columns in a table that can uniquely identify a row. Composite keys are particularly useful in situations where a single column is not sufficient to guarantee uniqueness. For example, in a table that records student enrollments, you might want to use both StudentID and CourseID as a composite key to ensure that each student can enroll in a course only once.
Prerequisites
Before we start, ensure you have the following:
- SQL Server 2019 installed on your machine or access to a SQL Server instance.
- SQL Server Management Studio (SSMS) installed to manage your SQL Server databases.
Steps to Create Composite Primary Keys
Let's walk through the steps to create a composite primary key in SQL Server Management Studio.
Step 1: Open SQL Server Management Studio
- Launch SQL Server Management Studio.
- Connect to your SQL Server instance by entering your authentication details.
Step 2: Create a New Database (Optional)
If you want to create your composite key in a new database, follow these steps:
- Right-click on the Databases node in the Object Explorer.
- Select New Database....
- Enter a name for your database (e.g.,
SchoolDB) and click OK.
Step 3: Create a New Table
- Right-click on the Tables node under your database in the Object Explorer.
- Select New Table.
Step 4: Define Columns
In the new table design window:
- Define the columns you need. For example, let's create a table named
Enrollmentswith the following columns:StudentID(int)CourseID(int)EnrollmentDate(datetime)
Here’s how you can define these columns:
Column Name:
StudentID- Data Type:
int - Allow Nulls: Uncheck
- Data Type:
Column Name:
CourseID- Data Type:
int - Allow Nulls: Uncheck
- Data Type:
Column Name:
EnrollmentDate- Data Type:
datetime - Allow Nulls: Check
- Data Type:
Step 5: Set the Composite Primary Key
- Select both
StudentIDandCourseIDcolumns by holding down the Ctrl key and clicking on each column header. - Right-click on one of the selected column headers.
- Choose Set Primary Key from the context menu.
Step 6: Save the Table
- Click on the Save icon in the toolbar or press Ctrl + S.
- Provide a name for your table (e.g.,
Enrollments) and click OK.
Step 7: Verify the Primary Key
To verify that your composite primary key has been created:
- Expand the Tables node in the Object Explorer.
- Right-click on
Enrollmentsand select Design. - In the table design view, check the key icon next to the
StudentIDandCourseIDcolumns.
Conclusion
Creating composite primary keys in SQL Server 2019 using SQL Server Management Studio is a straightforward process that enhances data integrity by ensuring that no duplicate records exist based on the combination of specified columns. By following the above steps, you can effectively implement composite keys in your database designs.
For further exploration, consider experimenting with foreign keys or other constraints that can help enrich your database schema. Happy querying!

Connect with SkillBakery Studios
Explore more tutorials, tools, and resources:
Posted by SkillBakery Studios


 Hello, my name is Jack Sparrow. I'm a 50 year old self-employed Pirate from the Caribbean.
No comments:
Post a Comment