
Vue.js 101 : Creating Dynamic & Engaging Vue.js Components with Combined Transitions and Animations
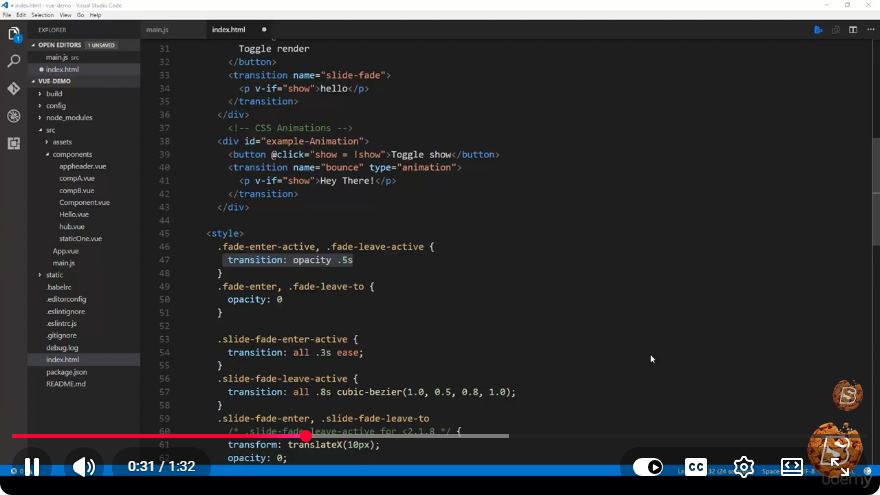
Vue.js 101: Creating Dynamic & Engaging Vue.js Components with Combined Transitions and Animations
Vue.js is a powerful framework for building interactive web applications. One of its standout features is its ability to create dynamic components that can transition and animate smoothly. In this post, we will explore how to create engaging Vue.js components using combined transitions and animations.
What Are Transitions and Animations?
Before diving into code, it's important to understand the difference between transitions and animations:
Transitions: These are used to create smooth changes between two states of an element. For example, fading an element in and out or moving it from one position to another.
Animations: These allow for more complex movements and can be defined with keyframes. They provide more control over the timing and behavior of the changes.
Vue.js makes implementing both transitions and animations straightforward with its built-in directives.
Setting Up Your Vue.js Environment
To get started, ensure you have a Vue.js environment set up. You can use Vue CLI to create a new project:
vue create my-vue-app
cd my-vue-app
npm run serve
This will create a new Vue.js application and start a local development server.
Creating a Simple Component
Let’s create a simple Vue component that will demonstrate transitions and animations. Start by creating a new component named MyComponent.vue in the src/components directory.
<template>
  <div class="my-component">
    <transition name="fade">
      <p v-if="isVisible">Hello, Vue.js!</p>
    </transition>
    <button @click="toggleVisibility">Toggle Message</button>
  </div>
</template>

<script>
export default {
  data() {
    return {
      isVisible: true,
    };
  },
  methods: {
    toggleVisibility() {
      this.isVisible = !this.isVisible;
    },
  },
};
</script>

<style>
.fade-enter-active, .fade-leave-active {
  transition: opacity 0.5s;
}
.fade-enter, .fade-leave-to /* .fade-leave-active in <2.1.8 */ {
  opacity: 0;
}
</style>
Breakdown of the Component
Template: Contains a paragraph that will toggle its visibility and a button to trigger the toggle.
Script: The
datafunction returns an object holding theisVisiblestate, while thetoggleVisibilitymethod updates this state.Style: CSS classes define the transition effect for fading in and out using the
opacityproperty.
Adding Combined Transitions and Animations
To enhance our component, let's add an animation that moves the text in from the left when it appears. Update your component as follows:
<template>
  <div class="my-component">
    <transition
      name="fade"
      @before-enter="beforeEnter"
      @enter="enter"
      @leave="leave">
      <p v-if="isVisible">Hello, Vue.js!</p>
    </transition>
    <button @click="toggleVisibility">Toggle Message</button>
  </div>
</template>

<script>
export default {
  data() {
    return {
      isVisible: true,
    };
  },
  methods: {
    toggleVisibility() {
      this.isVisible = !this.isVisible;
    },
    beforeEnter(el) {
      el.style.transform = 'translateX(-100%)';
      el.style.opacity = 0;
    },
    enter(el, done) {
      el.offsetHeight; // trigger reflow
      el.style.transition = 'transform 0.5s, opacity 0.5s';
      el.style.transform = 'translateX(0)';
      el.style.opacity = 1;
      done();
    },
    leave(el, done) {
      el.style.transition = 'transform 0.5s, opacity 0.5s';
      el.style.transform = 'translateX(-100%)';
      el.style.opacity = 0;
      done();
    },
  },
};
</script>

<style>
.fade-enter-active, .fade-leave-active {
  transition: opacity 0.5s;
}
.fade-enter, .fade-leave-to /* .fade-leave-active in <2.1.8 */ {
  opacity: 0;
}
</style>
Explanation of Combined Transitions and Animations
Transition Events: We utilize Vue's transition hooks (
@before-enter,@enter, and@leave) to control animations directly.Methods:
beforeEnter: Sets the initial state of the element before it enters the DOM.enter: Applies the final state of the element once it has been inserted into the DOM.leave: Defines how the element exits the DOM.
Running Your Application
After making these changes, run your application:
npm run serve
Open your browser and navigate to the local server. Click the button to see the text toggle with a fade and slide-in animation.
Conclusion
In this tutorial, we explored how to create dynamic and engaging components in Vue.js using transitions and animations. Vue's powerful capabilities allow developers to create smooth and visually appealing applications with minimal effort. Keep experimenting with different transitions and animations to enhance the user experience in your Vue.js projects!
For further exploration, consider checking out the Vue.js documentation for more advanced examples and use cases. Happy coding!
Connect with SkillBakery Studios
Explore more tutorials, tools, and resources:
Posted by SkillBakery Studios


 Hello, my name is Jack Sparrow. I'm a 50 year old self-employed Pirate from the Caribbean.
No comments:
Post a Comment