
Vue.js 101 : Managing Vue.js Component States: Understanding the Vue Lifecycle
Vue.js 101: Managing Vue.js Component States and Understanding the Vue Lifecycle
Vue.js is a progressive JavaScript framework that enables developers to build user interfaces and single-page applications. One of the key concepts in Vue.js is the management of component states and understanding the lifecycle of a component. In this blog post, we'll explore how to effectively manage component states in Vue.js and gain insights into the Vue lifecycle.
What Are Component States?
In Vue.js, a component state refers to the data that controls the behavior and rendering of a component. Each component has its own state, which can include data properties, computed properties, methods, and watchers. Managing these states effectively is crucial for building responsive and dynamic applications.
Data Properties
The data option in a Vue component defines the initial state. Data properties are reactive, meaning when they change, the UI automatically updates to reflect those changes.
new Vue({
  el: '#app',
  data: {
    message: 'Hello, Vue!',
    counter: 0
  }
});
Methods
Methods can be defined to manipulate the data properties. When a method is called, it can modify the state and trigger a re-render of the component.
methods: {
  incrementCounter() {
    this.counter++;
  }
}
Understanding the Vue Lifecycle
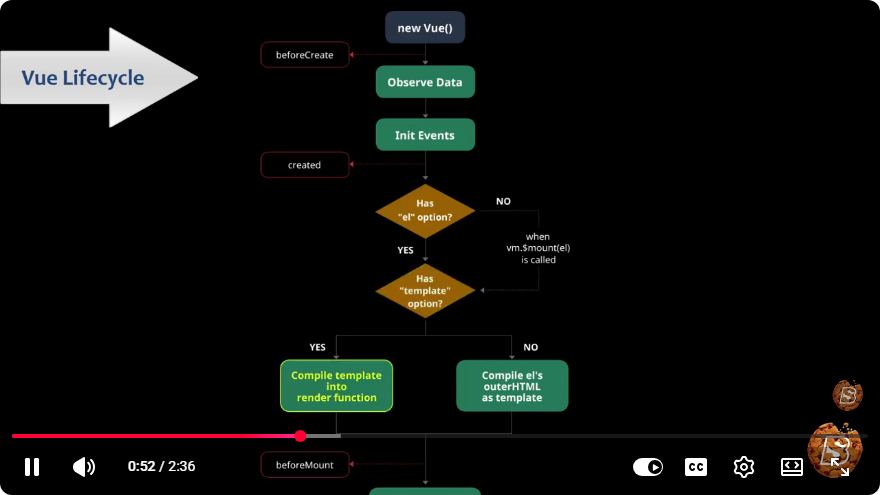
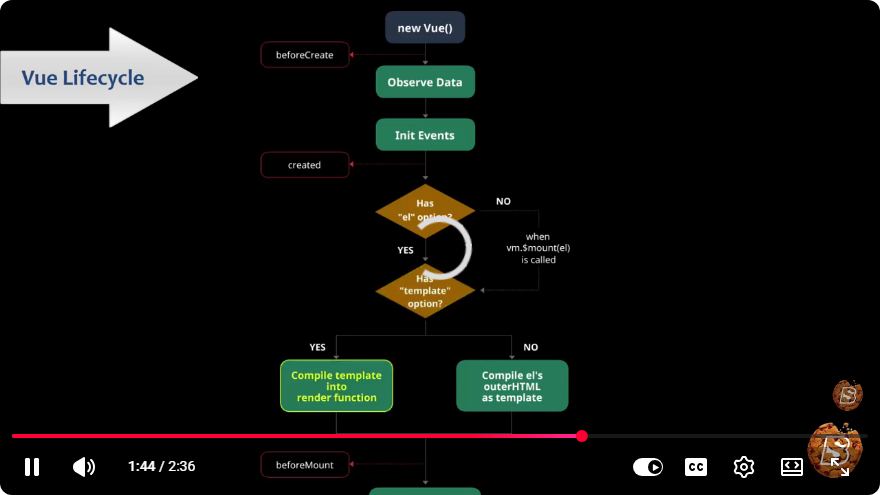
Every Vue component goes through a series of stages from its creation to its destruction, known as the component lifecycle. Understanding these stages is essential for managing data and performing certain actions at specific points during a component's existence.
Lifecycle Hooks
Vue provides a series of lifecycle hooks that allow you to execute code at specific points in a component's lifecycle. Here are some of the most commonly used hooks:
created: Called after the instance is created. At this stage, data observation has been set up, but the DOM has not yet been mounted.
created() { console.log('Component is created'); }mounted: Called after the component has been mounted to the DOM. You can perform operations that require the DOM elements to be available here.
mounted() { console.log('Component is mounted'); }updated: Called after a data change causes the virtual DOM to re-render. You can use this hook to perform actions based on the updated state.
updated() { console.log('Component is updated'); }destroyed: Called before the component is destroyed. This is a good time to clean up resources, such as removing event listeners.
destroyed() {
  console.log('Component is destroyed');
}
Managing Component States with Lifecycle Hooks
Using the lifecycle hooks effectively can help you manage the component states better. For instance, you might want to fetch data when the component is created and then update the state accordingly.
Example: Fetching Data on Component Creation
new Vue({
  el: '#app',
  data: {
    items: []
  },
  created() {
    // Simulate an API call
    setTimeout(() => {
      this.items = ['Item 1', 'Item 2', 'Item 3'];
    }, 1000);
  }
});
In the example above, the created hook is used to fetch data asynchronously. Once the data is retrieved, it updates the items array, which automatically updates the UI.
Conclusion
Managing component states and understanding the Vue lifecycle are fundamental skills for any Vue.js developer. By effectively using data properties and lifecycle hooks, you can create dynamic applications that respond to user interactions seamlessly.
As you continue your journey with Vue.js, remember to leverage these concepts to enhance your development process and improve the user experience of your applications. For more in-depth learning, consider exploring the official Vue.js documentation or engaging with the vibrant Vue community. Happy coding!
Connect with SkillBakery Studios
Explore more tutorials, tools, and resources:
Posted by SkillBakery Studios


 Hello, my name is Jack Sparrow. I'm a 50 year old self-employed Pirate from the Caribbean.
No comments:
Post a Comment