
Web Developers : 22- Develop a Protected Client page in Next.js with getServerSideProps
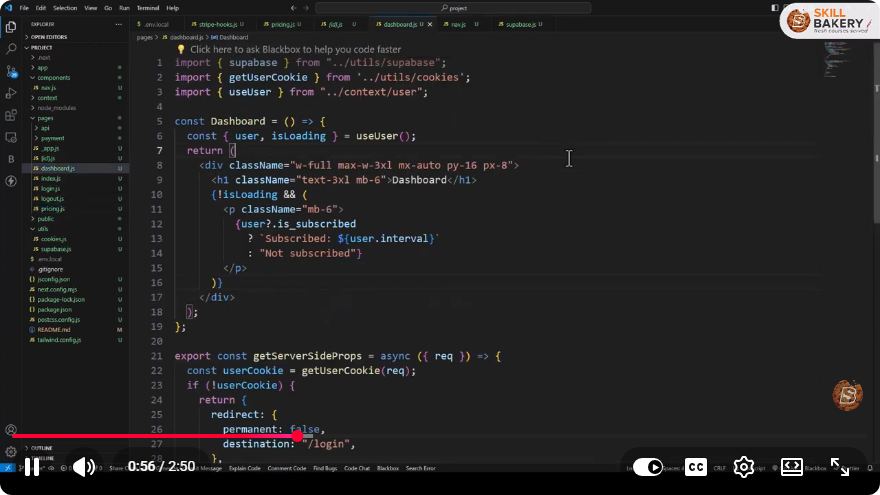
Creating a Protected Client Page in Next.js with getServerSideProps
In the world of web development, creating secure and protected client pages is crucial to safeguard sensitive data and enhance user experience. This tutorial will guide you through the process of developing a protected client page in Next.js using the powerful getServerSideProps function. We’ll cover the fundamentals of Next.js, authentication, and server-side rendering, ensuring you have a solid understanding of the concepts along the way.
What is Next.js?
Next.js is a popular React framework that enables developers to build server-rendered applications with ease. It supports features like static site generation, server-side rendering, and API routes. One of the standout features of Next.js is its ability to fetch data on the server side, offering improved performance and SEO benefits.
Overview of getServerSideProps
The getServerSideProps function is a Next.js data-fetching method that runs on the server side before rendering a page. This allows you to fetch data and perform operations, such as authentication checks, ensuring that only authorized users can access certain pages.
Setting Up Your Next.js Project
If you haven’t already, start by creating a new Next.js project. Run the following commands in your terminal:
npx create-next-app my-protected-page
cd my-protected-page
npm run dev
This will set up a new Next.js application and start the development server.
Implementing Authentication
For demonstration purposes, let’s implement a simple authentication mechanism. In a real-world application, you would typically use a library like JWT or OAuth, but for simplicity, we’ll use a mock authentication function.
Create a new file called auth.js in the lib directory:
// lib/auth.js
export const isAuthenticated = (req) => {
  // Mock authentication check
  const token = req.cookies.token;
  return token === 'valid-token'; // Replace with real authentication logic
};
In this mock function, we check if the request contains a valid token.
Creating the Protected Page
Next, let's create a new protected page. Create a file called protected.js in the pages directory:
// pages/protected.js
import React from 'react';

const ProtectedPage = ({ user }) => {
  return (
    <div>
      <h1>Welcome, {user.name}</h1>
      <p>This is a protected page.</p>
    </div>
  );
};

export default ProtectedPage;
Using getServerSideProps for Server-Side Rendering
Now, we’ll implement getServerSideProps to check the user’s authentication status before rendering the protected page. Update the protected.js file as follows:
// pages/protected.js
import React from 'react';
import { isAuthenticated } from '../lib/auth';

const ProtectedPage = ({ user }) => {
  return (
    <div>
      <h1>Welcome, {user.name}</h1>
      <p>This is a protected page.</p>
    </div>
  );
};

export async function getServerSideProps(context) {
  const { req, res } = context;

  // Check if the user is authenticated
  if (!isAuthenticated(req)) {
    // Redirect to the login page if not authenticated
    res.writeHead(302, { Location: '/login' });
    res.end();
    return { props: {} }; // Return empty props
  }

  // If authenticated, fetch user data (mock example)
  const user = { name: 'John Doe' }; // Replace with real user fetching logic

  return {
    props: { user }, // Pass user data to the page component
  };
}

export default ProtectedPage;
Explanation of getServerSideProps
- Context Parameter: The
contextparameter gives you access to the request and response objects. - Authentication Check: We call our
isAuthenticatedfunction to check if the user is logged in. - Redirection: If the user is not authenticated, we redirect them to the login page.
- Fetching User Data: If the user is authenticated, we can fetch their data and pass it to the page component via props.
Testing the Protected Page
To test the protected page, you need to simulate a user being logged in. You can set a cookie in your browser with the name token and value valid-token. Once this is done, navigate to /protected, and you should see the welcome message.
If you try to access the page without the valid token, you will be redirected to the login page.
Conclusion
In this tutorial, we covered how to create a protected client page in Next.js using getServerSideProps. We looked at basic authentication checks, server-side rendering, and how to manage user access effectively.
Next.js makes it easy to build secure applications with robust user authentication, and by leveraging its server-side capabilities, you can enhance the security and performance of your web applications.
Feel free to expand upon this example by integrating real authentication methods and user data fetching mechanisms. Happy coding!
Connect with SkillBakery Studios
Explore more tutorials, tools, and resources:
Posted by SkillBakery Studios


 Hello, my name is Jack Sparrow. I'm a 50 year old self-employed Pirate from the Caribbean.
No comments:
Post a Comment