
Web Development: Laravel - Creating a Project
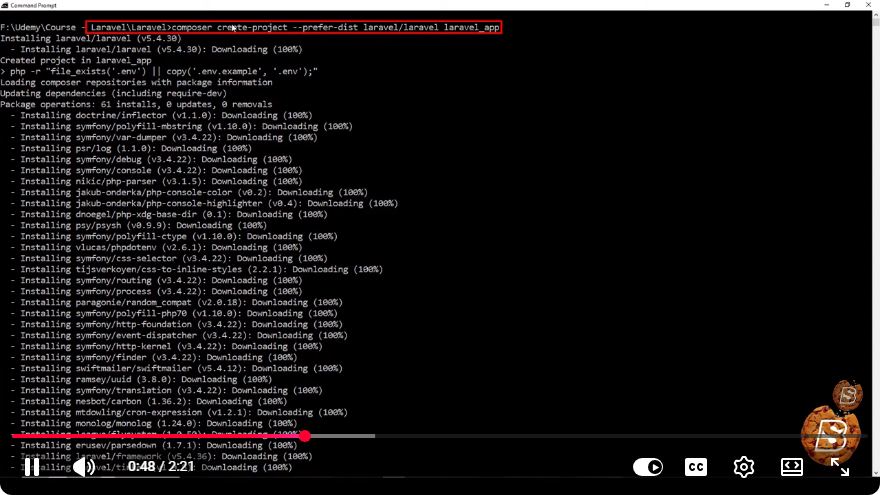
Web Development: Getting Started with Laravel in 2 Minutes
Laravel is a powerful PHP framework designed for web application development. It is known for its elegant syntax, robust features, and ease of use. This tutorial will guide you through the process of creating a new Laravel project in just a couple of minutes, as demonstrated in the video "Web Development: Laravel - Creating a Project."
Prerequisites
Before you begin, ensure that you have the following installed on your machine:
- PHP (version 7.3 or higher)
- Composer (a dependency manager for PHP)
- Node.js (optional, for front-end dependencies)
- A local development environment (such as XAMPP, MAMP, or Laravel Homestead).
Step 1: Install Composer
If you haven't installed Composer yet, follow these steps:
- Download the Composer installer from getcomposer.org.
- Follow the installation instructions for your operating system.
Once installed, you can verify the installation by running:
composer --version
Step 2: Install Laravel
With Composer ready, you can now install Laravel. Open your terminal or command prompt and run the following command:
composer global require laravel/installer
This command will install the Laravel installer globally on your machine, allowing you to create Laravel projects easily.
Step 3: Create a New Laravel Project
To create a new Laravel project, navigate to the directory where you want to store your project and run the following command. Replace project-name with your desired project name:
laravel new project-name
Alternatively, if you prefer to use Composer directly, you can create a new Laravel project with:
composer create-project --prefer-dist laravel/laravel project-name
Step 4: Navigate to Your Project Directory
Once the installation is complete, navigate into your new project directory:
cd project-name
Step 5: Start the Development Server
Laravel comes with a built-in development server that you can use to run your application locally. To start the server, execute the following command:
php artisan serve
By default, the server will start on http://localhost:8000. Open your web browser and navigate to this URL to see your new Laravel application in action!
Conclusion
Congratulations! You have successfully created a new Laravel project in just a few minutes. Laravel's elegant syntax and powerful features make it an excellent choice for web development. From here, you can start building your application by exploring Laravel's extensive documentation and utilizing its various features, such as routing, middleware, and database management.
Next Steps
- Explore Laravel’s official documentation for in-depth guides and tutorials.
- Familiarize yourself with Laravel’s MVC architecture.
- Experiment with creating routes, controllers, views, and database migrations.
By following this guide, you're well on your way to becoming proficient in Laravel development. Happy coding!
Connect with SkillBakery Studios
Explore more tutorials, tools, and resources:
Posted by SkillBakery Studios


 Hello, my name is Jack Sparrow. I'm a 50 year old self-employed Pirate from the Caribbean.
No comments:
Post a Comment