
Lecture-15: RAG for Beginners: Build an AI Chatbot with RAG | Complete Proof of Concept
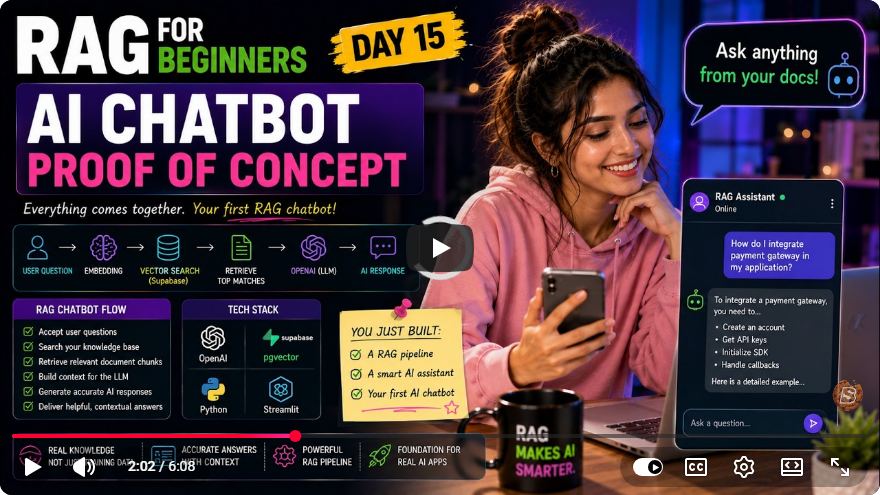
Building an AI Chatbot with RAG: A Step-by-Step Guide
Welcome to this comprehensive tutorial on creating a simple AI chatbot using Retrieval-Augmented Generation (RAG) techniques. In this guide, we'll walk through the foundational concepts, recap previous lessons, and ultimately build a working proof-of-concept chatbot that leverages a vector database for enhanced responses.
Table of Contents
- Introduction to RAG
- Recap of Previous Lessons
- Setting Up the Development Environment
- Building the Chatbot
- Testing the Chatbot
- Conclusion and Next Steps
1. Introduction to RAG
Retrieval-Augmented Generation (RAG) is a powerful approach that combines traditional retrieval methods with modern generative models. By integrating a vector database, RAG allows the chatbot to pull relevant information from a large corpus of data, thereby improving the accuracy and relevance of its responses.
In this tutorial, we will create a chatbot that can provide movie recommendations based on user queries.
2. Recap of Previous Lessons
Before diving into the code, let’s briefly recap what we covered in the previous session:
- When querying our vector database, it's more effective to retrieve multiple relevant chunks rather than just the top result.
- By ranking these results based on similarity, we can combine them into a cleaner context to feed into our language model, enhancing the quality of responses.
3. Setting Up the Development Environment
To get started, ensure you have the necessary tools installed:
- Node.js: Make sure you have Node.js installed on your machine.
- Packages: You’ll need to install the following packages via npm:
npm install openai supabase readline
Once your environment is ready, create a new file called chatbot.js.
4. Building the Chatbot
Now let's dive into the code. Below is the complete implementation of our chatbot.
// chatbot.js
const OpenAI = require('openai');
const { createEmbedding } = require('./embedding');
const Supabase = require('./Supabase');
const readline = require('readline');

const rl = readline.createInterface({
  input: process.stdin,
  output: process.stdout
});

async function askQuestion(question) {
  const embedding = await createEmbedding(question);
  const results = await Supabase.search(embedding);

  if (!results || results.length === 0) {
    console.log("I don't have enough information.");
    return;
  }

  const topMatches = results.slice(0, 3); // Get top 3 matches
  const context = topMatches.map(match => match.text).join("\n");

  const prompt = `You are a helpful movie expert assistant. Answer the question using only the information from the source below:\n${context}\n\nQuestion: ${question}`;

  const response = await OpenAI.complete({ prompt });
  console.log(response.text);
}

function startChatbot() {
  console.log("Movie Knowledge Chatbot: Type 'exit' to quit.");

  rl.question('Ask a question: ', async (question) => {
    if (question.toLowerCase() === 'exit') {
      rl.close();
      return;
    }

    await askQuestion(question);
    startChatbot(); // Loop to ask another question
  });
}

startChatbot();
Code Explanation
Imports: We import necessary packages including OpenAI, a custom embedding module, Supabase for database interactions, and readline for terminal input.
askQuestion Function: This function takes a user query, generates an embedding, retrieves relevant documents from the database, and constructs a context to prompt the AI model.
startChatbot Function: This method initializes the chatbot, prompts the user for questions, and handles exit commands.
User Interaction: The chatbot will continue prompting the user for questions until the user types 'exit'.
5. Testing the Chatbot
Once you have the code in place, run your chatbot with the following command:
node chatbot.js
Example Interaction
Scenario 1: Valid Query
- User: "I want a drama that explores human emotions and vulnerability."
- Bot: "Based on the information provided, I recommend a heartfelt film that explores human emotions and vulnerability."
Scenario 2: Invalid Query
- User: "Tell me about a movie that doesn’t exist in the database."
- Bot: "I don't have enough information."
This interaction demonstrates how well the chatbot can provide relevant responses based on the data it has access to while also gracefully handling queries it cannot answer.
6. Conclusion and Next Steps
Congratulations! You've successfully built a basic AI chatbot using Retrieval-Augmented Generation techniques. This chatbot can search a vector database and provide relevant movie recommendations based on user queries.
As a next step, consider expanding the chatbot’s capabilities by:
- Integrating a larger dataset for more varied responses.
- Implementing additional features such as user profiles or saving favorite movies.
- Enhancing the user interface with a web-based frontend.
Feel free to explore the provided resources and modify the chatbot according to your needs. Happy coding!
If you found this tutorial helpful, don’t forget to like and subscribe for more content!
Connect with SkillBakery Studios
Explore more tutorials, tools, and resources:
Posted by SkillBakery Studios


 Hello, my name is Jack Sparrow. I'm a 50 year old self-employed Pirate from the Caribbean.
No comments:
Post a Comment