
MoonJs - for Directive
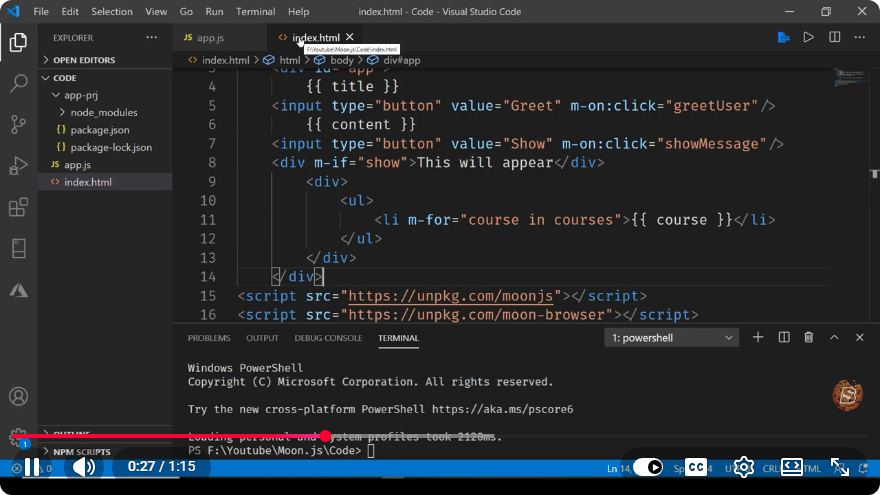
MoonJs: A Quick Introduction to Directive Programming
In the ever-evolving landscape of web development, new frameworks and libraries are continuously emerging to simplify the process of building interactive user interfaces. One of these is MoonJs, a lightweight JavaScript framework that emphasizes simplicity and performance. In this blog post, we will delve into what MoonJs is, how it works, and how to get started with it using directives.
What is MoonJs?
MoonJs is a minimalistic JavaScript framework designed to create reactive user interfaces. Similar to Vue.js, it allows developers to create components that update in real time based on changes in data. The framework is particularly notable for its small footprint, making it an excellent choice for projects where performance is a priority.
Key Features of MoonJs
- Lightweight: MoonJs is designed to be small, allowing for faster load times and improved performance.
- Reactive Data Binding: It provides a straightforward approach to data binding, ensuring that changes in the model are automatically reflected in the view.
- Directives: MoonJs uses directives to extend HTML with custom behavior, making it easier to create dynamic content.
Getting Started with MoonJs
Before we dive into directives, let’s set up a simple environment to work with MoonJs.
Step 1: Setting Up Your Project
Create a new HTML file called index.html and include the MoonJs library. You can either download it or link to a CDN:
<!DOCTYPE html>
<html lang="en">
<head>
    <meta charset="UTF-8">
    <meta name="viewport" content="width=device-width, initial-scale=1.0">
    <title>MoonJs Tutorial</title>
    <script src="https://unpkg.com/moonjs/dist/moon.min.js"></script>
</head>
<body>
    <div id="app">
        <!-- Your MoonJs code will go here -->
    </div>
    <script src="app.js"></script>
</body>
</html>
Step 2: Creating Your First App
Next, create a JavaScript file named app.js. Here, we will set up a simple MoonJs instance:
const { createApp } = Moon;

createApp({
    data: {
        message: 'Hello, MoonJs!'
    }
}).mount('#app');
This code initializes a MoonJs app with a reactive message property. When you run this code, you should see "Hello, MoonJs!" displayed on the page.
Understanding Directives in MoonJs
Directives in MoonJs allow you to bind data to the HTML elements dynamically. They provide a way to perform operations like conditional rendering, event handling, and data binding.
Common Directives
m-text: Binds text content to an element.m-html: Binds HTML content to an element.m-if: Conditionally renders an element based on a boolean expression.m-for: Iterates over an array to render a list of elements.
Example: Using Directives
Let’s enhance our previous example by using directives to display a list of items.
Update your index.html file:
<div id="app">
    <h1 m-text="message"></h1>
    <ul>
        <li m-for="item in items" m-text="item"></li>
    </ul>
</div>
And modify your app.js file:
const { createApp } = Moon;

createApp({
    data: {
        message: 'Hello, MoonJs!',
        items: ['Item 1', 'Item 2', 'Item 3']
    }
}).mount('#app');
What Happens Here?
In this example:
- The
m-textdirective displays themessagevariable in the<h1>tag. - The
m-fordirective iterates over theitemsarray, rendering each item as a list element.
Conclusion
MoonJs offers a minimalist yet powerful way to create interactive web applications. With its simple syntax and lightweight nature, it is ideal for developers looking to build efficient UIs without the overhead of larger frameworks.
In this tutorial, we covered the basics of MoonJs, including how to set up a project and use directives for data binding. As you explore MoonJs further, you will find that it provides an intuitive approach to building reactive applications.
To learn more about MoonJs, consider reviewing the official documentation, where you can find additional features, best practices, and advanced use cases. Happy coding!
Connect with SkillBakery Studios
Explore more tutorials, tools, and resources:
Posted by SkillBakery Studios


 Hello, my name is Jack Sparrow. I'm a 50 year old self-employed Pirate from the Caribbean.
No comments:
Post a Comment