
Lecture-5: MCP Resources Explained | Register Read-Only Data in Your MCP Server
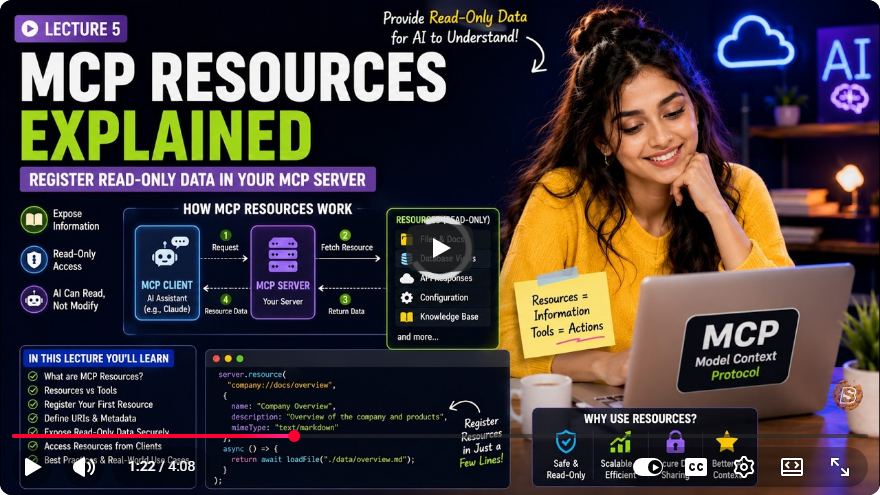
Understanding MCP Resources: A Comprehensive Guide to Registering Read-Only Data in Your MCP Server
In the evolving landscape of artificial intelligence and server management, the ability to effectively utilize resources is crucial. In this tutorial, we will delve into the concept of resources within a Model-Client-Provider (MCP) server, as discussed in the lecture "MCP Resources Explained". We will learn how to register read-only data, differentiate between static and dynamic resources, and explore their practical applications.
What are MCP Resources?
MCP resources are essentially read-only pieces of data that can be fetched by the AI or host application whenever context is needed. To put it simply, think of tools as the verbs (actions) and resources as the nouns (data) that the AI can interact with.
Differentiating Between Tools and Resources
To clarify the distinction:
- Tools: Used when the AI needs to perform an action or change something.
- Resources: Utilized when the AI needs to access information without making any changes.
This foundational understanding will guide us in the implementation of resources in our server.
Registering Resources
In this tutorial, we will register two types of resources: a static resource and a dynamic resource.
1. Static Resource: Tasks All
The first resource we will create is tasks/all, which returns a complete list of tasks in JSON format. Here’s how to implement this in your code:
// Registering the static resource
serverInstance.resources.tasksAll = {
    id: 'tasks/all',
    content: function() {
        return JSON.stringify(getAllTasks()); // Function to fetch all tasks
    }
};
In this code snippet:
serverInstance.resourcesis where we define our resources.tasksAllis the name given to our resource.- The
contentfunction returns a JSON string of all tasks, which is fetched by the functiongetAllTasks().
2. Dynamic Resource: Task by ID
Our second resource is a dynamic or templated resource, which allows the AI to request a specific task by its ID. This is more powerful as it can adapt to various requests. Below is the implementation:
// Registering the dynamic resource
serverInstance.resources.taskById = {
    id: 'tasks/{id}', // Templated resource
    content: function(id) {
        return JSON.stringify(getTaskById(id)); // Function to fetch task by ID
    }
};
In this example:
- The
{id}in the resource ID allows the URI to change dynamically based on the request. - The
contentfunction takes anidparameter to fetch the specific task usinggetTaskById(id).
Testing the Resources
Once you have registered your resources, it’s time to test them. Here’s how:
Run Your Server: Execute the command below in your terminal to start your server.
npm run inspectConnect to Your Server: Click the provided link to connect.
Access the Resources Tab:
- Navigate to the resources section of your application.
- Click on the "List Resources" button.
View Static Resource:
- Select
all tasksto view the complete list of tasks.
- Select
View Dynamic Resource:
- Click on
single task, enter a specific task ID (e.g., 1, 2, or 17), and click “read resource” to see the details of that task.
- Click on
This interactive process showcases how the AI can pull context from your server, effectively using both tools and resources.
Conclusion
You now have a foundational understanding of how to register and utilize resources in your MCP server. The combination of static and dynamic resources allows for a flexible, robust architecture that can cater to various application needs.
In our next tutorial, we will explore running and debugging the server in greater detail, shedding light on the mechanics of client connections and server interactions.
Feel free to download the project from the description, experiment with the new resources, and enhance your server capabilities. If you found this tutorial helpful, don’t forget to like and subscribe for more insightful content!
For further learning and resources, visit skillbakery.com. Happy coding!
Connect with SkillBakery Studios
Explore more tutorials, tools, and resources:
Posted by SkillBakery Studios


 Hello, my name is Jack Sparrow. I'm a 50 year old self-employed Pirate from the Caribbean.
No comments:
Post a Comment