
Lecture:4-Build Your First MCP Server from Scratch | Define AI Tools with Model Context Protocol
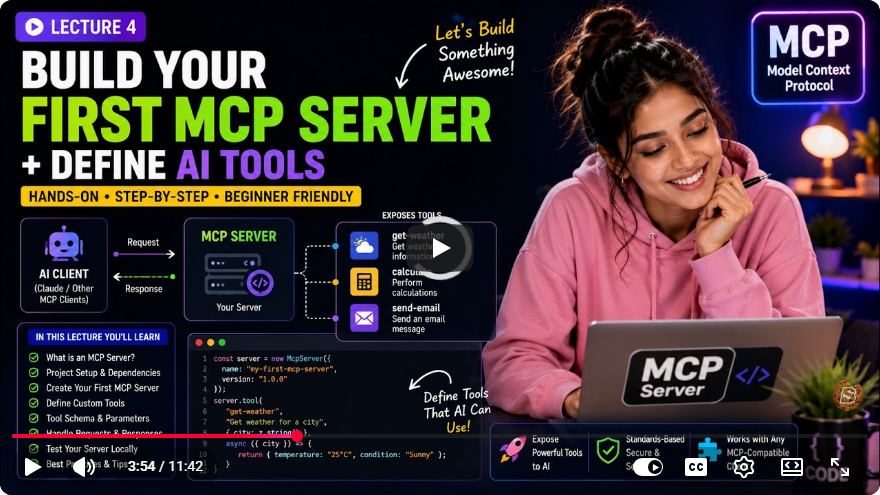
Build Your First MCP Server from Scratch: A Step-by-Step Guide
In this tutorial, we will walk you through the process of building your first Model Context Protocol (MCP) server from scratch. By the end of this guide, you will have a functioning notes and task server that can interact with any AI using three basic tools: listing tasks, adding tasks, and completing tasks. This post will cover the necessary setup, code implementation, and the rationale behind each step.
Prerequisites
Before we dive in, ensure you have the following:
- Node.js and npm installed on your machine
- Basic understanding of TypeScript and JavaScript
- Familiarity with command-line interfaces
Step 1: Set Up the Project Directory
First, create a directory for your project. You can name it whatever you like; for this guide, we’ll call it mcp-notes-task-server.
mkdir mcp-notes-task-server
cd mcp-notes-task-server
Step 2: Initialize the Project
Next, initialize your npm project by running the following command:
npm init -y
This command creates a package.json file in your project directory. In this file, ensure that the type is set to module to enable modern ES modules:
{
  "type": "module",
  ...
}
Step 3: Install Required Packages
Now, let’s install the necessary packages for our MCP server. Run the following commands:
npm install model-context-protocol-sdk zod
npm install -D typescript tsx @types/node
Explanation of Installed Packages
model-context-protocol-sdk: This is the official library from the MCP team that provides the MCP server class and the tools for communication.
Zod: A TypeScript-first schema declaration library that helps define the arguments our tools accept, ensuring that the AI understands how to interact with them.
TypeScript: We use TypeScript for type safety and better development practices.
tsx: This allows you to run TypeScript files directly without needing to compile them first, streamlining the development process.
@types/node: This package provides type definitions for Node.js, ensuring type safety in your project.
Step 4: Create TypeScript Configuration
Next, create a tsconfig.json file in your project directory to set up TypeScript options:
{
  "compilerOptions": {
    "target": "ESNext",
    "module": "ESNext",
    "strict": true,
    "esModuleInterop": true,
    "skipLibCheck": true,
    "forceConsistentCasingInFileNames": true,
    "types": ["node"]
  }
}
Step 5: Create the Source Directory and Index File
Now, create a src directory and an index.ts file inside it:
mkdir src
touch src/index.ts
Step 6: Write the Server Code
Open src/index.ts and start writing the server code. Below is a basic implementation:
import { MCPServer } from 'model-context-protocol-sdk';
import { z } from 'zod';

// Define the task interface
interface Task {
  id: number;
  title: string;
  description: string;
  completed: boolean;
  createdAt: Date;
}

// In-memory task list
const tasks: Task[] = [];

// Create the MCP server instance
const server = new MCPServer('Notes and Tasks Server', '1.0');

// Define the tools
server.tool('listTasks', {
  description: 'List all tasks',
  invoke: () => {
    return {
      type: 'success',
      text: JSON.stringify(tasks)
    };
  }
});

server.tool('addTask', {
  description: 'Add a new task',
  invoke: (args) => {
    const taskSchema = z.object({
      title: z.string().nonempty(),
      description: z.string().optional()
    });
    const parsedArgs = taskSchema.parse(args);

    const newTask: Task = {
      id: tasks.length + 1,
      title: parsedArgs.title,
      description: parsedArgs.description || '',
      completed: false,
      createdAt: new Date()
    };
    tasks.push(newTask);

    return {
      type: 'success',
      text: `Task "${newTask.title}" added successfully.`
    };
  }
});

server.tool('completeTask', {
  description: 'Complete a task',
  invoke: (args) => {
    const idSchema = z.number().positive();
    const parsedId = idSchema.parse(args.id);

    const task = tasks.find(task => task.id === parsedId);
    if (task) {
      task.completed = true;
      return {
        type: 'success',
        text: `Task "${task.title}" marked as completed.`
      };
    }
    return {
      type: 'error',
      text: 'Task not found.'
    };
  }
});

// Start the server
server.start();
Explanation of the Code
- Task Interface: Defines the structure of a task object.
- In-memory Task List: A simple array to store tasks temporarily.
- MCP Server Instance: Created to handle our tools.
- Tool Definitions: Each tool (list, add, complete) is defined with an associated function to handle its logic.
- Server Start: Finally, the server is started, ready to accept connections.
Step 7: Communicate with the Server
To communicate with the server, you can use the MCP Inspector. You can launch it with the following command:
npx model-context-protocol/insspector
Alternatively, you can set up a script in your package.json to simplify this:
"scripts": {
  "inspect": "npx model-context-protocol/insspector tsx src/index.ts"
}
Now you can run:
npm run inspect
This will open a UI where you can interact with your server, call tools, and see the responses.
Conclusion
Congratulations! You have successfully built an MCP server from scratch that can manage tasks. You learned how to set up a project, install necessary dependencies, and implement server logic with TypeScript. This foundational knowledge will serve you well as you explore more complex features in future videos.
Feel free to download the complete code from the GitHub repository (link to be provided) and experiment further. In the next tutorial, we will enhance the server by adding resources so that the AI can read data.
If you found this guide helpful, please share it with others and subscribe for more tutorials!
Connect with SkillBakery Studios
Explore more tutorials, tools, and resources:
Posted by SkillBakery Studios


 Hello, my name is Jack Sparrow. I'm a 50 year old self-employed Pirate from the Caribbean.
No comments:
Post a Comment