
Lecture-7: RAG for Beginners – Day 7: Set Up Supabase Vector Database with pgvector | Step-by-Step
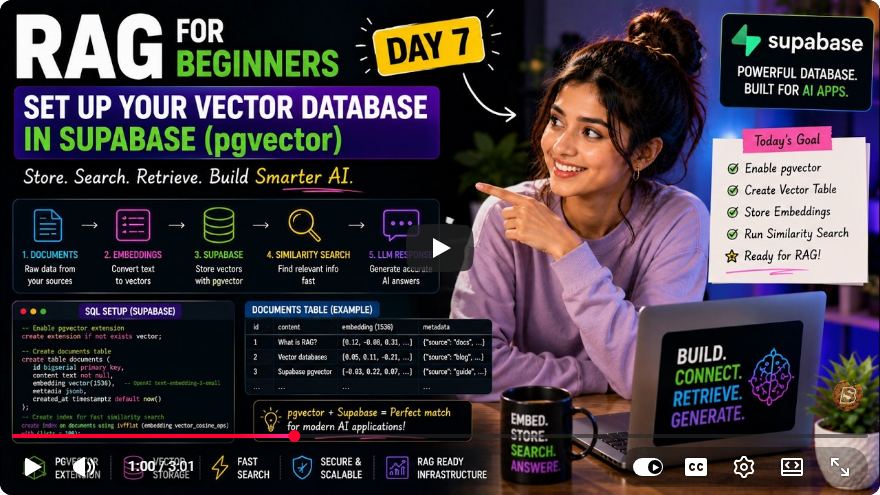
Setting Up a Vector Database with Supabase and pgvector: A Step-by-Step Guide
Welcome to our comprehensive tutorial on creating a vector database using Supabase and the pgvector extension. In this guide, we’ll walk you through the process of setting up your vector database, which will enable you to store and retrieve embeddings efficiently. By the end of this tutorial, you will have a fully functional vector database that can be used for various applications, including Natural Language Processing (NLP) tasks.
Prerequisites
Before we start, ensure you have the following:
- A Supabase account. If you don’t have one, sign up at supabase.com.
- A project created in Supabase.
- Basic understanding of SQL commands.
Step 1: Logging into Supabase
- Go to supabase.com and log in to your account.
- Select your project from the dashboard.
Step 2: Opening the SQL Editor
Once you are inside your project, follow these steps to access the SQL editor:
- In the left sidebar, find the SQL Editor option and click on it.
- A new query window will open where you can execute SQL commands.
Step 3: Enabling the pgvector Extension
The first crucial step in setting up your vector database is enabling the pgvector extension. This extension allows you to store and compare vectors in PostgreSQL efficiently. To enable it, run the following SQL command:
CREATE EXTENSION IF NOT EXISTS vector;
- Select the command above and click on the Run Selected button (the green button).
- You should see a success message indicating that the extension has been enabled.
Step 4: Creating the Documents Table
Next, we will create a table named documents that will store our text content and their corresponding embeddings. Execute the following SQL statement:
CREATE TABLE documents (
    id SERIAL PRIMARY KEY,
    content TEXT,
    embedding VECTOR(1536)
);
Understanding the Command
- id: This is a unique identifier for each document, set as the primary key.
- content: This column will store the text content.
- embedding: This column will store the embedding vector. The size of the vector is set to 1536, which corresponds to the output size of the OpenAI text embedding model.
- Select the above command and click on Run Selected. Choose the option to Run without RLS (Row Level Security) if prompted.
- A success message should confirm that the table has been created.
Step 5: Creating an Index for Faster Searches
To enhance the performance of searching similar embeddings, we will create an index on the documents table. Run the following command:
CREATE INDEX documents_index ON documents USING IVF_FLAT WITH (distance_metric = 'cosine');
Explanation of the Command
- documents_index: This is the name of the index we are creating.
- IVF_FLAT: This specifies the indexing method. It is efficient for searching high-dimensional vectors.
- distance_metric: We are using cosine similarity as the metric for measuring the distance between vectors.
- Select this command and click on Run Selected.
- Again, you should see a success message confirming that the index has been created.
Step 6: Verifying the Setup
Now that we have completed the setup, let’s verify that our table has been created successfully:
- Click on the Table Editor in the left sidebar.
- Find and select the
documentstable. - You should see three columns: id, content, and embedding.
Congratulations! You have successfully set up a vector database in Supabase.
What’s Next?
In the next tutorial, we will learn how to insert our first embeddings into the documents table. This will enable us to start utilizing our vector database for practical applications.
If you found this tutorial helpful, please like and subscribe to our content for more educational resources. Happy coding!
By following these steps, you now have a grasp of how to set up a vector database using Supabase and pgvector. If you have any questions or run into issues, feel free to leave a comment below!
Connect with SkillBakery Studios
Explore more tutorials, tools, and resources:
Posted by SkillBakery Studios


 Hello, my name is Jack Sparrow. I'm a 50 year old self-employed Pirate from the Caribbean.
No comments:
Post a Comment